


 Agency (White Label)Getting StartedConfiguring Trafft
 Booking WebsiteCustom FeaturesIntegrationsAdmin Views
When accessing your Admin section, you’ll find the “Share Booking” button at the top. This button enables you to share your availability directly with your customers.
If you offer private services that you prefer not to display on the booking website but still want customers to access, this functionality becomes essential. It allows customers to book these private services seamlessly.

Clicking this button will open a new modal window where you will be able to choose the way in which the availability will be shared:
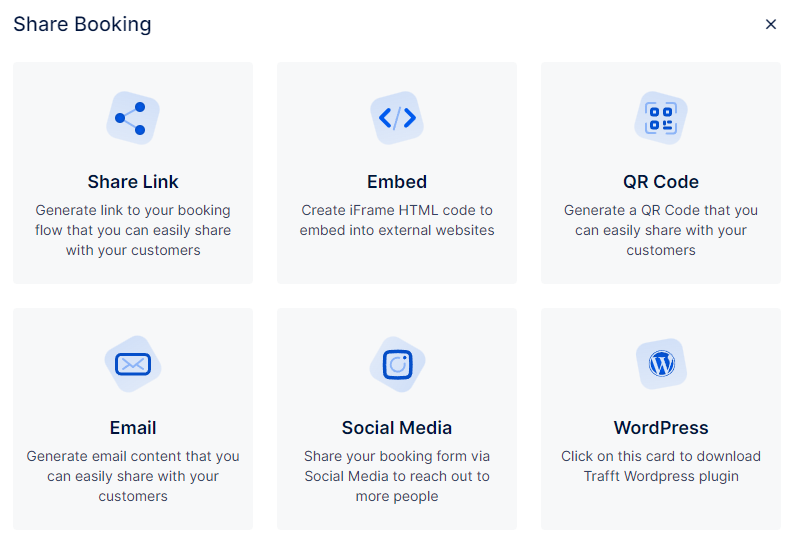
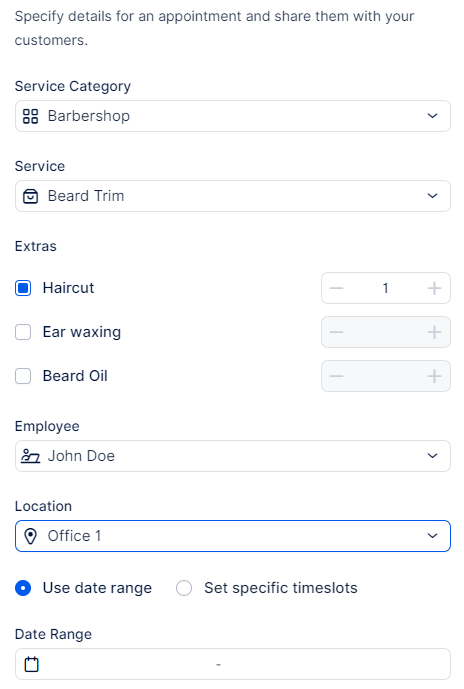
The WordPress option automatically downloads the WordPress plugin to your computer, but all other options allow you to define the appointment parameters such as the Service Category, the Service, the Employee, the Location, a specific date range, and/or the specific time slots.
If you select a specific service that has service Extras, they will be offered as an option as well.
The Use Date Range option allows you to select a single date (by double-clicking the date) or a range of dates when you will offer appointments, while the Set specific timeslots option allows you to select multiple timeslots (you can select a single date with multiple timeslots, or you can select multiple dates with different timeslots).
While the filters are the same for each sharing option, the end result is different.
Share Link
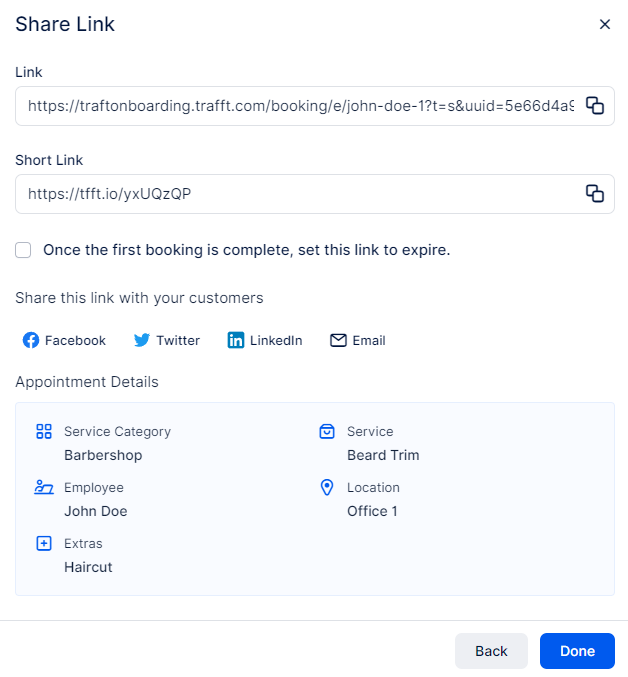
The end result of using the Share Link option is a generated link and a generated short link that you can copy and share with your customers.
Below the short link, you can tick a checkbox that destroys the link after the first booking is complete.
Facebook, Twitter, LinkedIn, and Email options automatically perform on-click actions and either redirect you to your social network profile, where you can share the link, or open an Email tool, so the link can be sent to your customers via email.
Finally, at the bottom of the modal window, you will see the appointment details that you’re sharing.
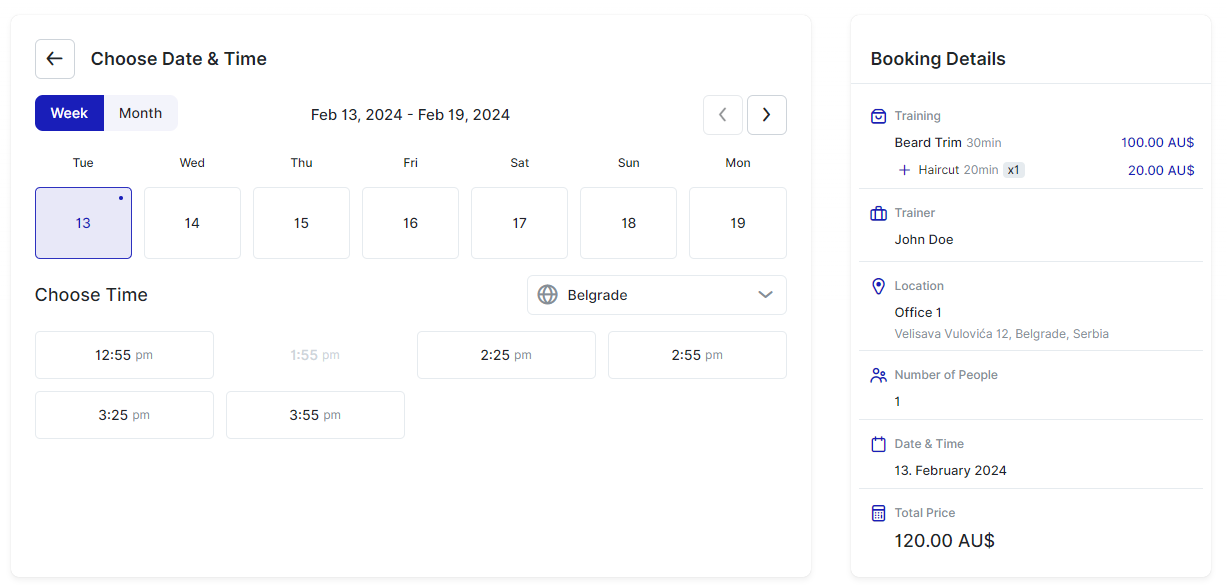
You can then paste the link into a new browser window to see what your customers will see. Depending on how Trafft was configured, and which filters you chose when you generated the link, the step you land on in the form may vary from selecting everything from the beginning to simply seeing the available dates and times for the appointment.
Embed
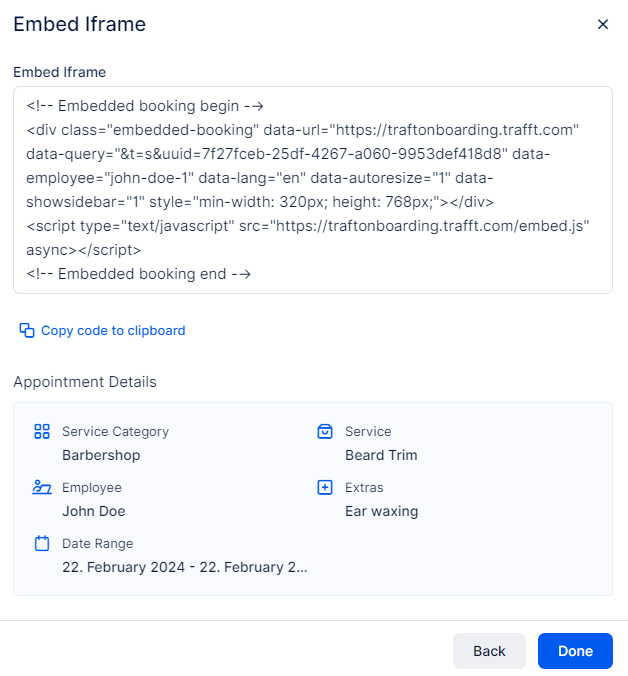
Apart from the embed code found in the Customize section of Trafft, you can define what you’ll embed on another website by using the Category/Service/Employee/Location/Date filters in the “Share Booking” functionality.
Selecting these parameters is the same as for the Share Link option, so after you define the parameters, Trafft will provide you with the iframe (embed code) that you can copy and paste on another website. The “Copy code to clipboard” option below the code saves you time so you don’t have to select the code with your mouse and copy it.
The appointment details below shows you the details of what you’re sharing.
QR Code
When you click the QR Code option, Trafft will offer two choices:
- Set Appointment Parameters (just like in the Share Link and the Embed options);
- Get a QR code immediately – this option creates a QR code that functions in the same way as your Booking website, so your customers will go through the entire booking process to make an appointment.
Once the QR code is generated, you will be able to copy its URL link, or download the image so you can share it with your customers.

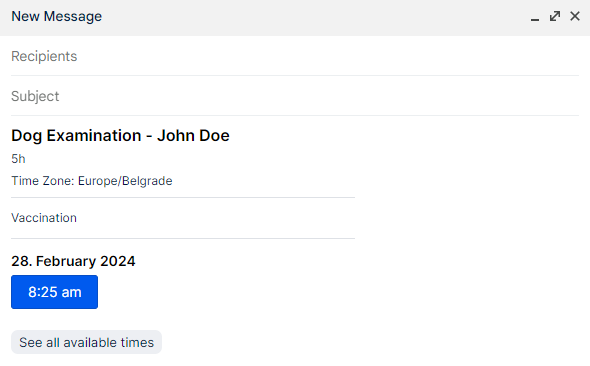
If you choose the Email option, once you configure the booking parameters, you will see an email draft that you can copy using the “Copy to clipboard” option.
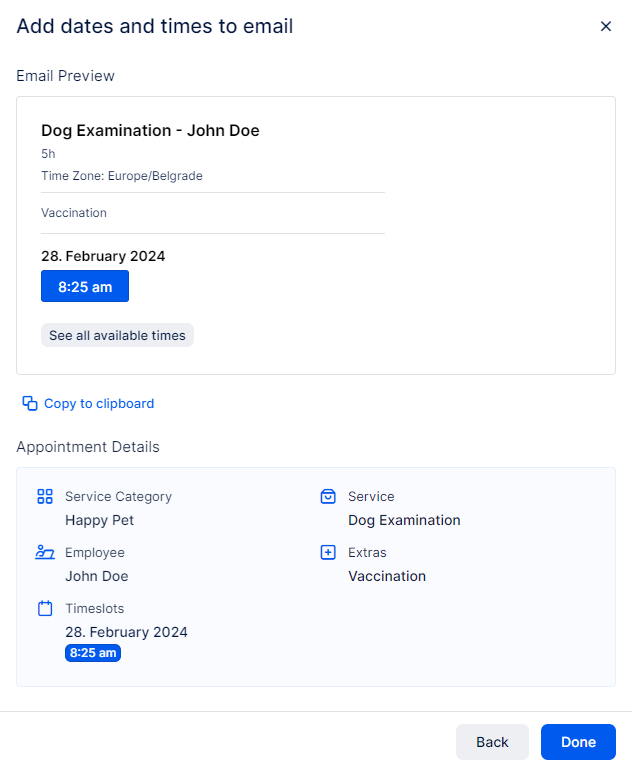
Once you paste this code in an email, it will be displayed exactly the way it is displayed in Trafft’s “share booking” modal window.
Social Media
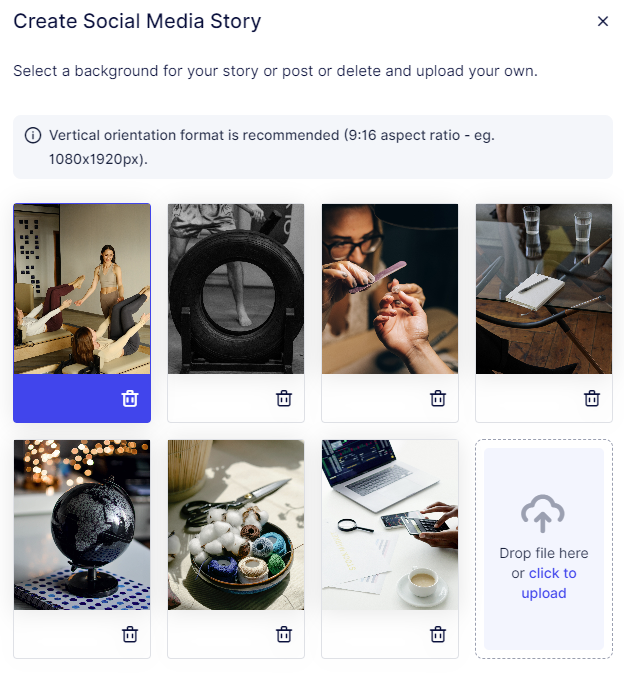
After defining the filters for what you’re about to share, you will see 7 predefined images that you will be able to select for your Social Media Story. The 8th option allows you to upload your own story image.
Please note that we recommend using a vertical orientation format, with a 9:16 aspect ratio (e.g., 1080x1920px).
Once you select (or upload) the image, click on Next to continue to the next step where you will define the content for the story.
The Title describes what you’re sharing while the Description below allows you to describe the offer to your social media audience. You can choose one of the fonts offered and select the font color, and everything will be displayed in the preview below.
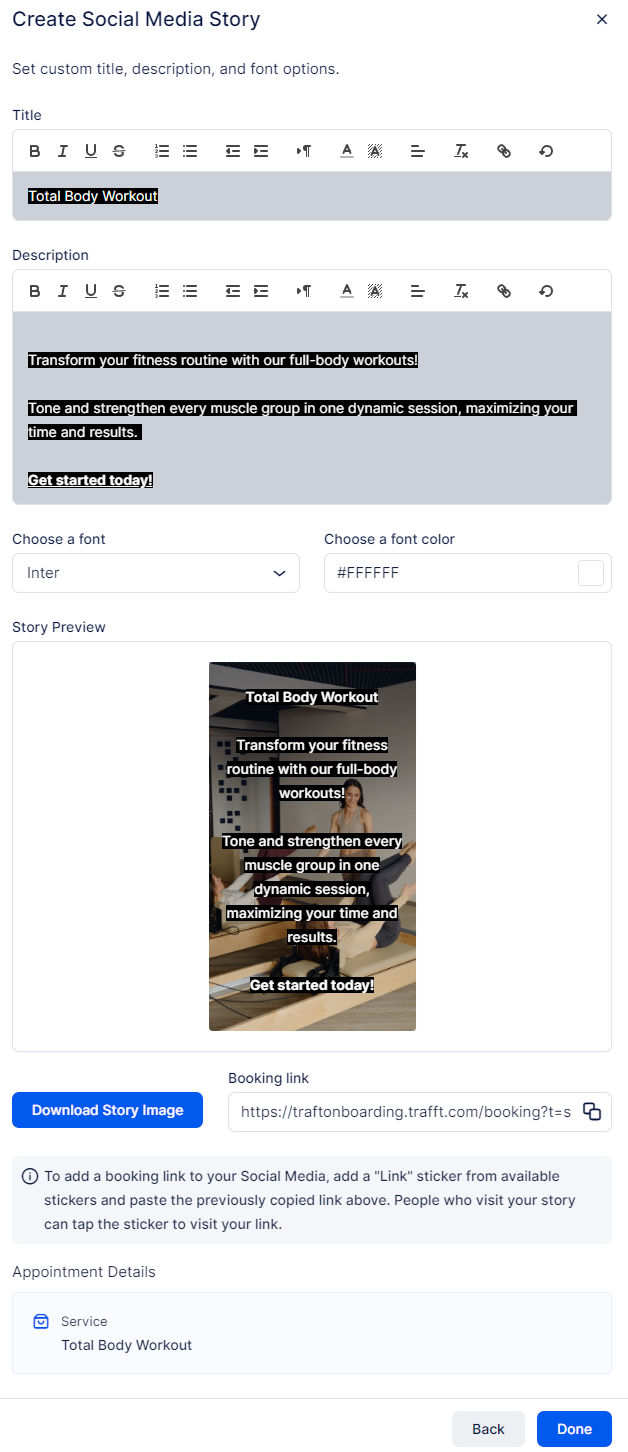
Using the provided link, you can add a “Link” sticker from available stickers and paste the previously copied link above. People who visit your story can tap the sticker to visit your link.
Once you’re done editing the image for the story, click the “Download Story Image” button to download the image and upload it to your social media profile.
WordPress Plugin
Clicking the “WordPress” card within the “Share Booking” popup modal will automatically download the zipped installation file for Trafft’s WordPress plugin.
Once you download the plugin to your computer, you need to install it on your website. For detailed information about how this integration can be used, please check out this page.
Have more questions?
If you face an issue, and cannot find an answer in the documentation, feel free to submit a support ticket!