


 Agency (White Label)Getting StartedConfiguring TrafftBooking Website
 Custom FeaturesIntegrationsAdmin Views
By default, all email notifications are sent from Trafft’s no-reply@trafft.com email address. However, to align with your brand identity, you have the option to customize the sender email address that your customers will see when receiving emails from Trafft.
Enabling the SMTP feature
To customize the sender’s email address, follow these steps:
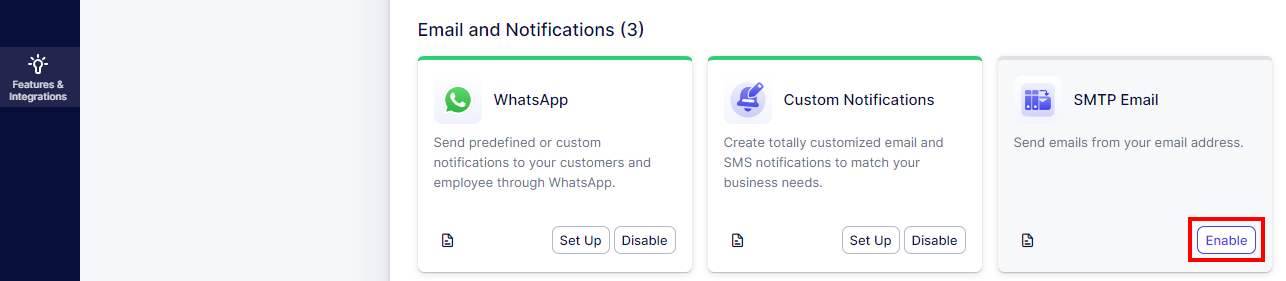
- Access the “Features & Integrations” section in your Trafft admin dashboard.
- Locate the “SMTP Email” feature and click on “Enable” to activate it.
- Once the card refreshes, you will see a “Set up” button next to the SMTP Email feature. Click on “Set up” to begin configuring your custom sender email address.
After clicking on “Set up” for the SMTP Email feature, you will be presented with fields to fill in your SMTP server details:
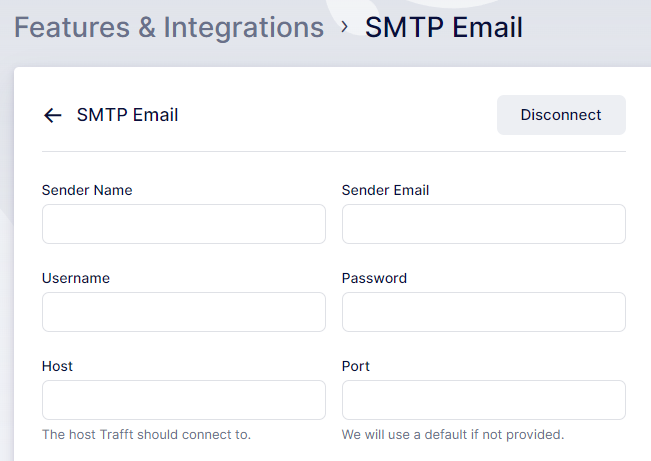
Here are the fields you’ll need to fill in for the SMTP Email feature:
- Sender Name: Enter your name or your business name. This will be displayed as the “from” name when recipients receive an email.
- Sender Email: Input the email address you want to use for sending emails.
- Host: If you are using a hosted email relay service, find the SMTP server hostname from your email service’s support page. For example, for Gmail, the host is typically smtp.gmail.com.
- Username: Enter your full email address.
- Password: Provide the password for your email account.
- Port: If you are using a hosted email relay service, find the SMTP server port number from your email service’s support page. For example, for Gmail, it’s typically 465 or 587.
- Save and Test Email: Click this button to send a test email and ensure that everything is working correctly.
Trafft will then use these settings to send email notifications, displaying the specified sender name and email address to your customers.
When using SMTP with Gmail, it’s necessary to set up an App Password for Trafft. App Passwords are required for accounts with 2-Step Verification enabled. You can find detailed instructions on how to set up an App Password for Trafft on Google’s Documentation, here.
For Microsoft accounts, including Microsoft 365 users, it’s also essential to create an App Password for Trafft. App Passwords are used with accounts that have 2-Step Verification enabled in the Security Basics section of your Microsoft account. Instructions for creating an App Password for Trafft can be found in Microsoft’s Documentation, here.
For Microsoft 365 users, particularly those with business accounts, creating an App Password is mandatory. However, for tenants created on or after October 22, 2019, Security Defaults are typically enabled by default. With Security Defaults enabled, older mail protocols like IMAP, SMTP, or POP3 may be blocked for authentication. To resolve this, you may need to disable Security Defaults. Detailed instructions on how to disable Security Defaults can be found here.
Have more questions?
If you face an issue, and cannot find an answer in the documentation, feel free to submit a support ticket!