


 Agency (White Label)Getting StartedConfiguring TrafftBooking WebsiteCustom Features
 IntegrationsAdmin Views
Integration with Google Calendar allows you to sync your working hours and prevent double-bookings between your work and personal calendars. Here’s how it works:
- All appointments created in Trafft will be automatically added to your Google Calendar.
- Busy slots in your Google Calendar will be marked as unavailable for booking in Trafft, preventing double bookings (action required, continue reading or skip to this part).
- You can easily reschedule or delete appointments directly in your Google Calendar, and these changes will be reflected in Trafft.
- Any updates made in Trafft, such as rescheduling or deleting appointments, will also be synced with your Google Calendar.
This integration streamlines your scheduling process, ensuring that your appointments are always in sync across both platforms.
Activating and Configuring the Google Calendar Synchronization
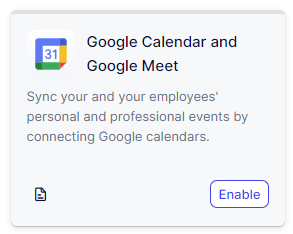
To enable it, navigate to the Features & Integrations section within Trafft. Locate the “Google Calendar and Google Meet” integration, and activate it with a simple click on the “Enable” button.
Once enabled, the card will refresh to display a “Set Up” button. Click it to access the configuration page for Google Calendar and Google Meet.
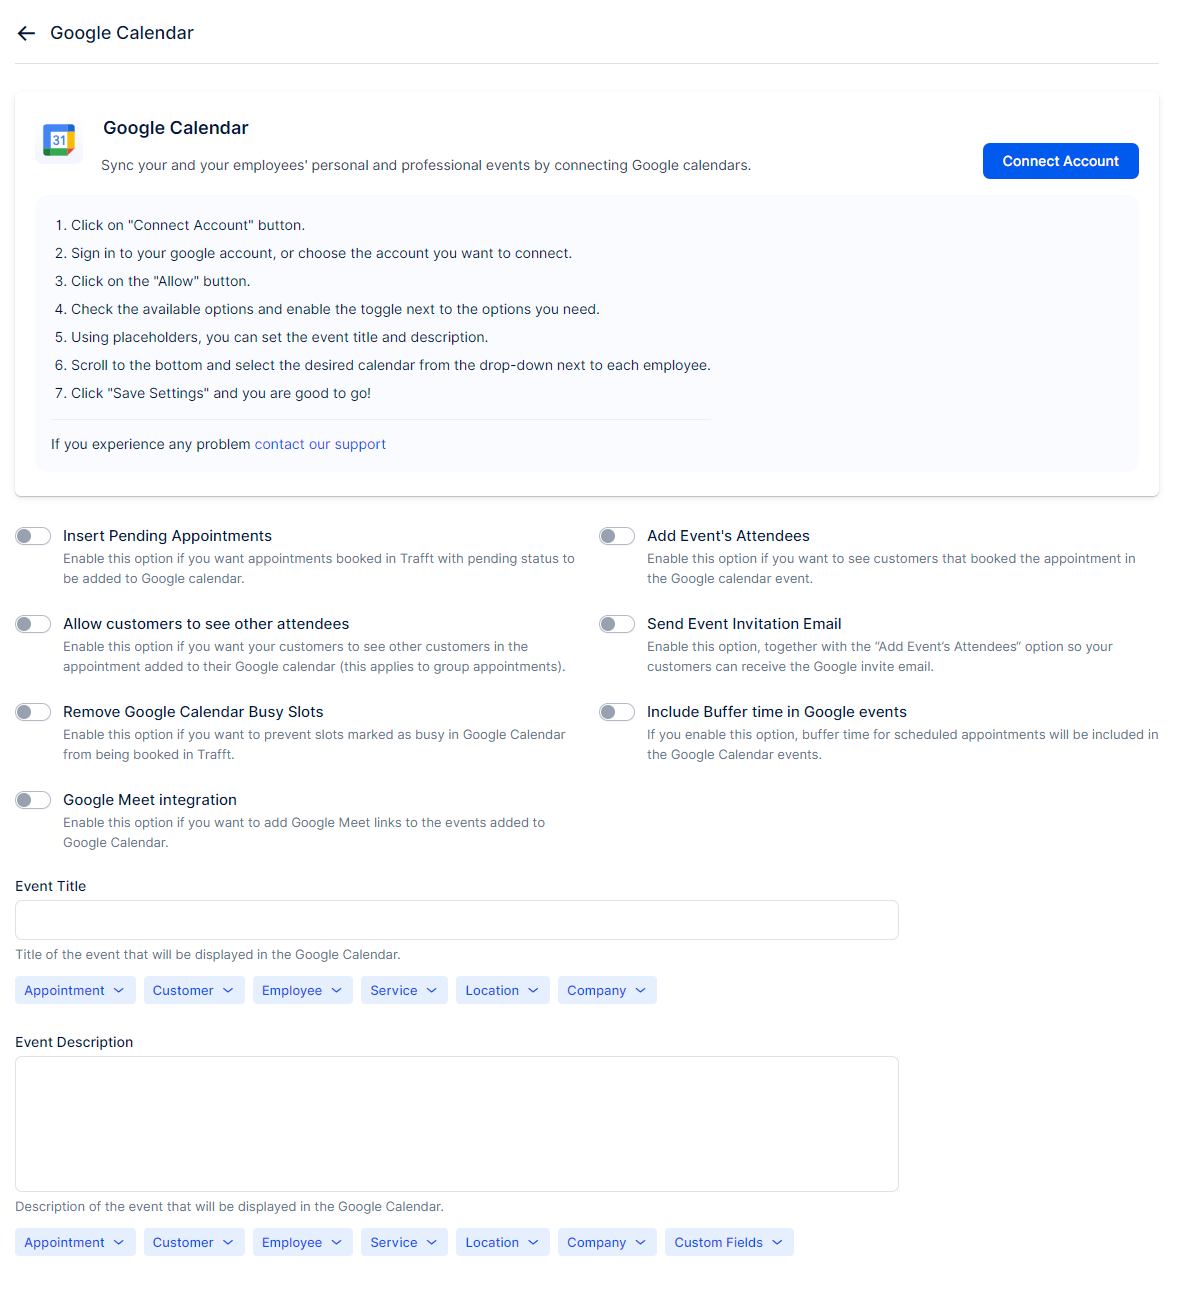
When you access the Google Calendar and Google Meet integration page for the first time, you’ll see the screenshot displayed above. Depending on your organization’s setup, there are two ways to use this integration:
- Link the Main Account: Click on the “Connect Account” button in the top right corner to link your main (admin) Google account with Trafft. This allows you to select calendars created in the linked Google account and assign them to your employees, who will be listed below the Event Title and Event Description (shown in the screenshot above) after connecting your account.
- Link via Account Settings: You can keep the integration enabled without connecting the main account through this page. Instead, you (and your employees) can connect to Google Calendar through the Account Settings. This allows you to link up to 6 Google accounts (per employee) and select multiple calendars from these accounts. These calendars can then be used to block availability in Trafft.
Regardless of the method you choose, you and your employees will be able to connect multiple calendars. Before diving into the detailed instructions for both approaches, let’s cover the settings that will assist you in configuring the Google synchronization to align with your specific needs.
- Insert Pending Appointments: This option, disabled by default, includes appointments with “Pending” status alongside “Approved” status appointments in the calendar.
- Add Event’s Attendees: Useful for group bookings, it shows all attendees (customers) within the Google Event.
- Allow customers to see other attendees: For group appointments, this option allows customers to view other attendees. It’s disabled by default, ensuring privacy.
- Send Event Invitation Email: This setting determines whether a Google invitation is sent to all participants. Enabling this will send two notifications for the appointment: one from Trafft and one as a Google invitation.
- Remove Google Calendar Busy Slots: Enabling this blocks slots marked as busy in your Google Calendar, preventing them from being booked in Trafft.
- Include Buffer time in Google Events: This setting determines if the event attendees will see only the original duration of appointments or also the buffer time before and/or after the appointment.
- Google Meet Integration: When enabled, Trafft integrates with Google Meet. Appointments for employees connected to Google will have the option to be held online, and the Google Meet link will automatically be added to their Google Calendar.
Event Title and Event Description
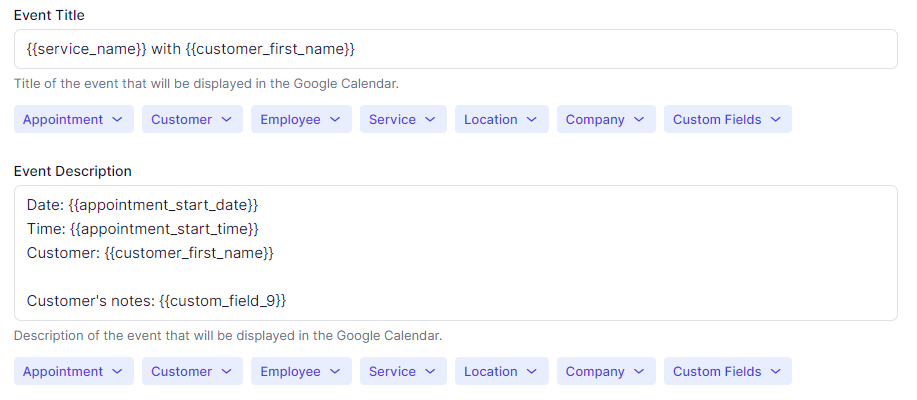
These two options offer you the ability to customize the Event title and description that will be displayed in the Google Calendar Event that’s created from Appointments in Trafft. This allows you to personalize the information shown for each appointment. Here’s how you can customize these fields using a combination of text and placeholders:
- Event Title: Place your cursor inside the “Event Title” field. Then, choose from the dropdown menu below the field to select the information you want to display in the Event title. By default, the {{service_name}} placeholder is added to the title but you can write custom text and include other placeholders if you want.
- Event Description: Similarly, you can customize the “Event Description” field. Place your cursor inside this field and select the desired information from the dropdown menu to include in the Event description. By default, the Event Description field is blank, allowing you to add specific details as needed.
Placeholders allow you to dynamically insert information into the Event title and description. By utilizing them, you can create customized and informative Event titles and descriptions that provide important details at a glance.
Linking the Main Account
Linking the main account is good for solopreneurs or organizations that have calendars for each employee stored in one Google account.
Once you connect the account through the main Google Calendar settings page, all the employees that you created will appear below the Event Title and Event Description section:

The screenshot above shows three different options related to employee’s connection with Google Calendar.
- “Mike Peters” currently isn’t connected to any Google accounts;
- “Employee Example” is connected through the Google Calendar integration page;
- “John Doe” is connected to his personal calendar through Account Settings.
By default, once the account is linked, all employees will appear below the Event Title and the Event Description with a blank dropdown menu, like “Mike Peters” in the screenshot above.
If you choose to assign a calendar to an employee, the dropdown will expand and pull all the calendars you have created in the Google Account you previously linked with Trafft. Assigning one of those calendars to an employee is showcased by the employee “Employee Example” in the screenshot above. Once an employee is linked in here, they won’t be able to link their personal Google accounts through Account Settings/Integrations, and they would see the following notification if they were to access this section:
This simply informs the employee that the Admin of the account linked their employee profile with one of the Google Calendars that exist in the admin’s Google account and they wouldn’t be able to click on the “Connect Account” button. In this case, if the employee needs to log into their Google account, the admin would have to go back into the Google Calendar and Google Meet integration page, hover over the dropdown next to this employee, and click on the “X” button to remove the connection. After saving these settings, the employee will be able to log into their calendar.
Allowing the employee to log into their calendar (“John Doe” in the screenshot above) basically covers Linking via Account Settings, so please continue reading to see how this is done.
Linking via Account Settings
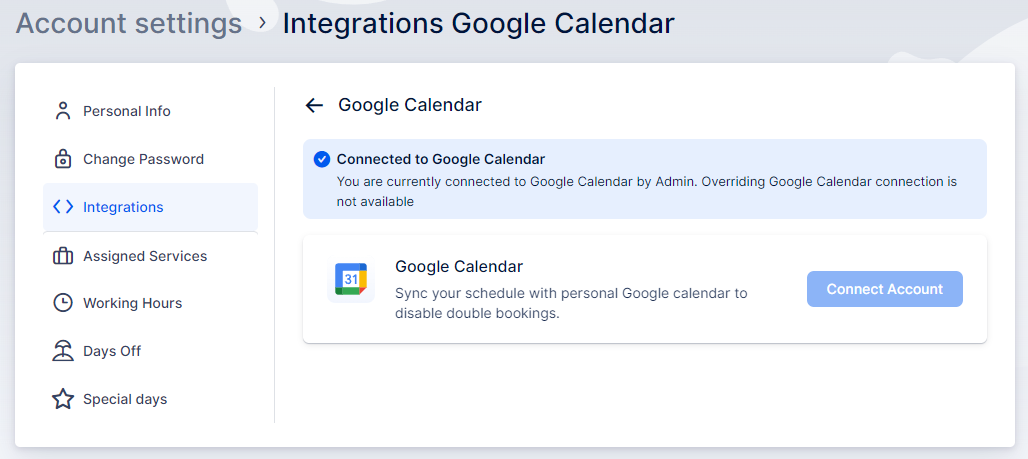
The “Overridden by Employee” option, displayed next to “John Doe” in the screenshot above (where three employees are listed), indicates that the default Google Calendar connection, initially established through the Google Calendar and Google Meet integration page, has been overridden by the employee. This override occurs when the employee logs into their own Google Account through the Account Settings.
This logic stems from the fact that while the Admin and Superadmin may be the administrators and owners of the Trafft account, respectively, they do not have access to the login information for the employee’s personal Google account. Additionally, many Google accounts are protected with 2FA (2-factor authentication) or MFA (Multi-factor authentication). Even if the employee were to share their login information, the admin or superadmin would not have access to the device used for the second factor of authentication.
Once the employee’s account is created by the Admin or the Superadmin, their login needs to be enabled. This process is covered in detail in the Users and Roles documentation section, so we will provide a summary here.
To enable employees to log into their accounts on Trafft, follow these steps:
- Access the “Settings” section located in the lower left corner of Trafft’s admin page.
- In the new page that appears, click on “Users and Roles“.
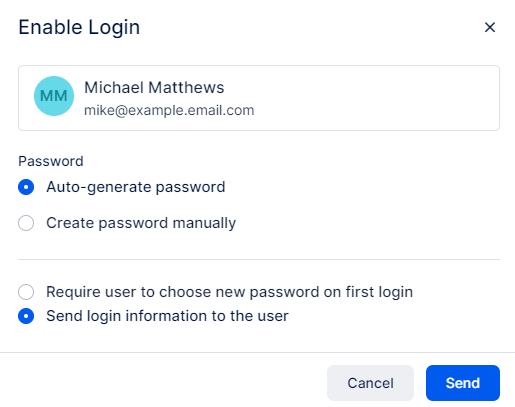
- Next to the employee you want to enable the login for, click on the three-dots menu -> Enable Login:

In a new popup that appears, you can choose whether Trafft will auto-generate a password or if you prefer to create a password manually for this employee. Below that, you can also define whether the employee will be required to choose a new password on the first login or if you’ll only send the login information to the user.
After the employee receives the login information, they can access their Trafft account. From there, instruct them to navigate to Account Settings to link their Google account with their employee account in Trafft.
To access the Account Settings, click on the name in the top right corner:

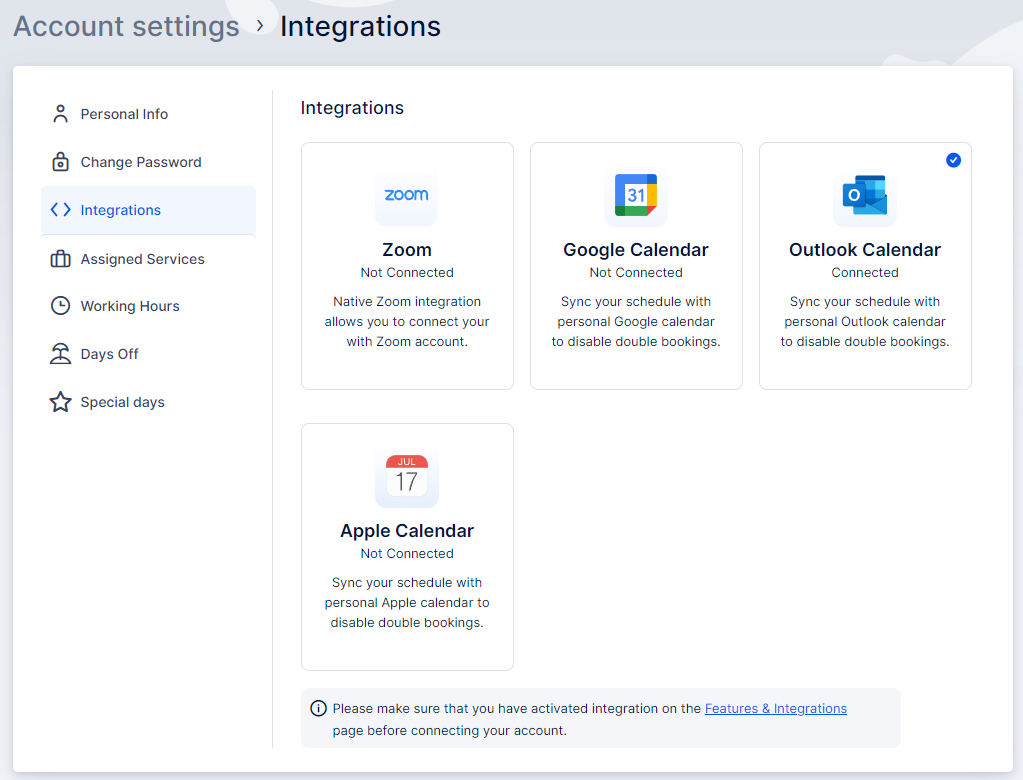
This will open a new window where the logged-in employee can update their personal information, change their password, and manage their schedule (if their user role allows). Most importantly for this integration, they can access the Integrations section and log into their personal Google account.
Once the Integration section is accessed, click on “Google Calendar“.
In there, click on “Connect Account” and Trafft will redirect you to Google’s log-in page where a Google account needs to be selected. After this, Google will also warn you that you’re allowing Trafft to view and edit events on all your calendars (calendars created in the account you’re logging into) and to see and download any calendar you can access using your Google Calendar.
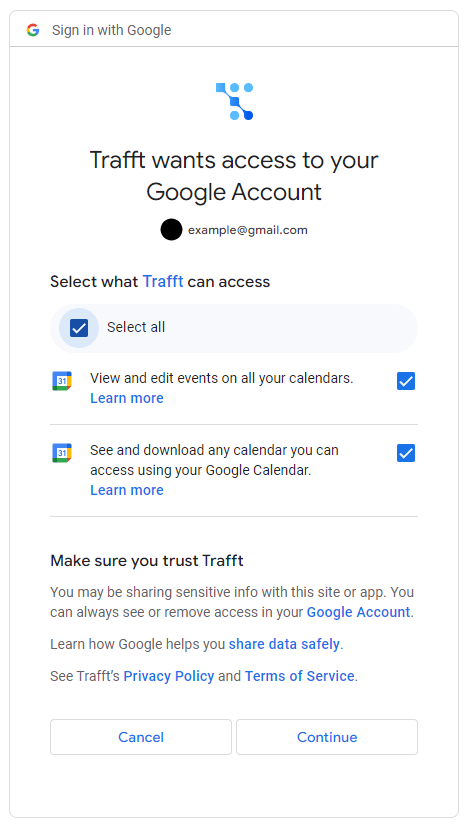
For the Google Calendar integration to work, you need to select both permissions and click on Continue, as shown in the screenshot above.
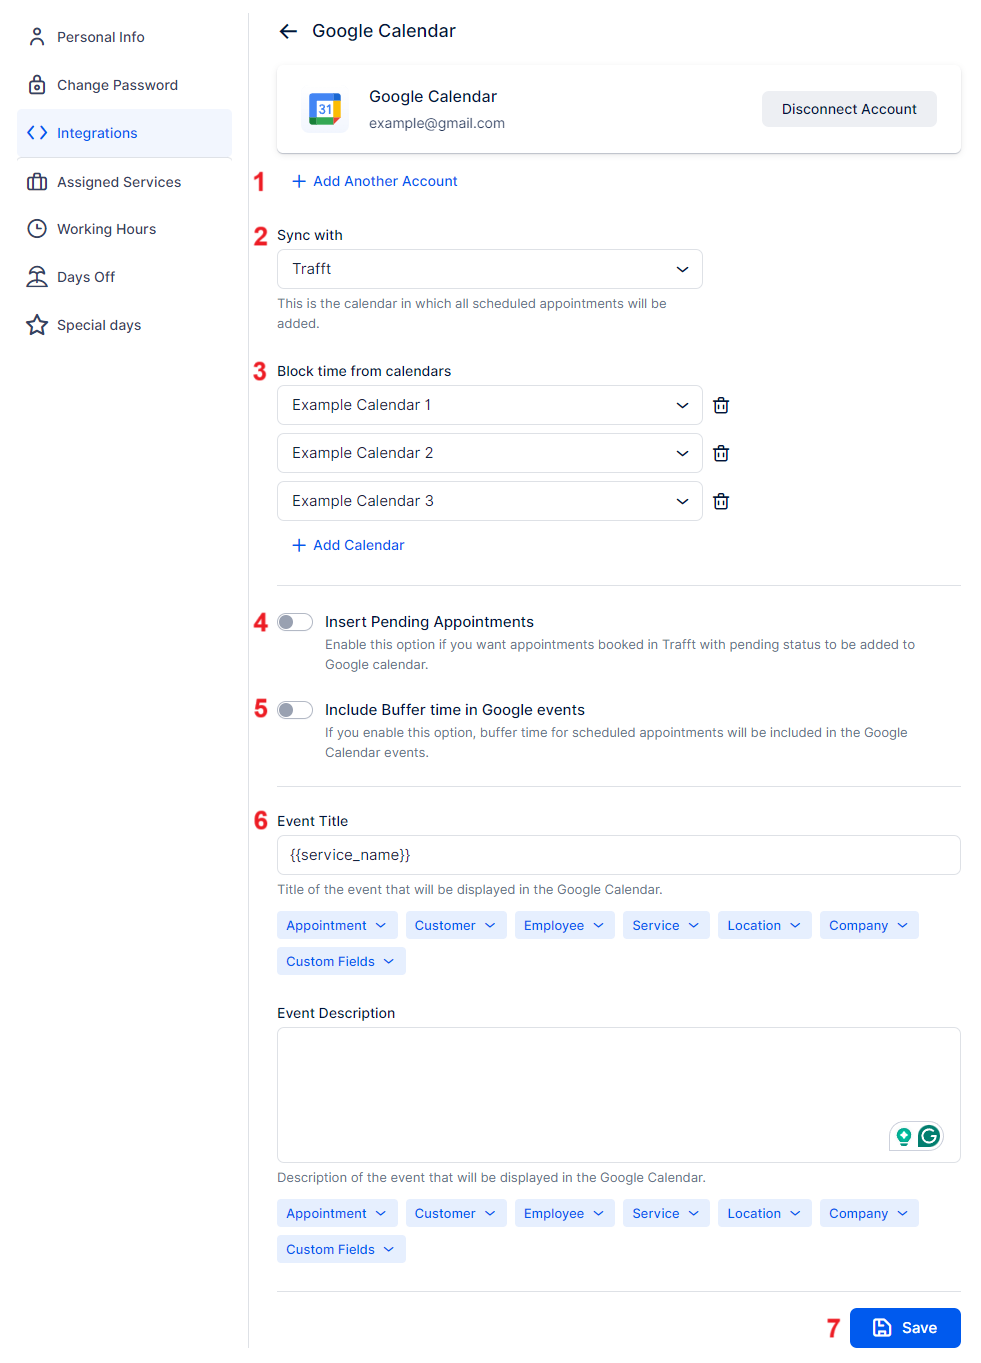
Once Trafft is allowed to access the Google account, you’ll be brought back to the Account Settings/Integrations page where you’ll see that your account is now connected. Showcased in the screenshot below, you will be able to:
- Add Another Account – One employee can add multiple accounts to be able to select calendars that are supposed to block times in Trafft. The maximum number of accounts that can be added is six.
- Sync with – Choose one of the connected calendars where all scheduled appointments from Trafft will be added. You can only select one account for this option.
- Block time from calendars – Select multiple calendars from which busy time slots will be blocked off in Trafft. You can add a maximum of six accounts by clicking “Add Calendar”. For instance, if you have a business calendar and a private calendar, adding both here will make all busy time slots in both calendars unavailable in Trafft.
- Insert Pending Appointments – by default, once the employee links their Google account, the default settings made in the Google Calendar and Google Meet integration page will not be pulled, so the employee needs to choose whether they’ll include Pending appointments made in Trafft in their Google Calendar.
- Include Buffer time in Google events – similarly, this option is not inherited from Google Calendar global settings, so the employee can choose whether they want buffer time added to the events created by Trafft or not.
- Event Title and Event Description – as you can see, this option also doesn’t pull the setup from the global settings, so the employee will need to populate the Event Title and the Event Description here.
- Don’t forget to save!
Google Meet
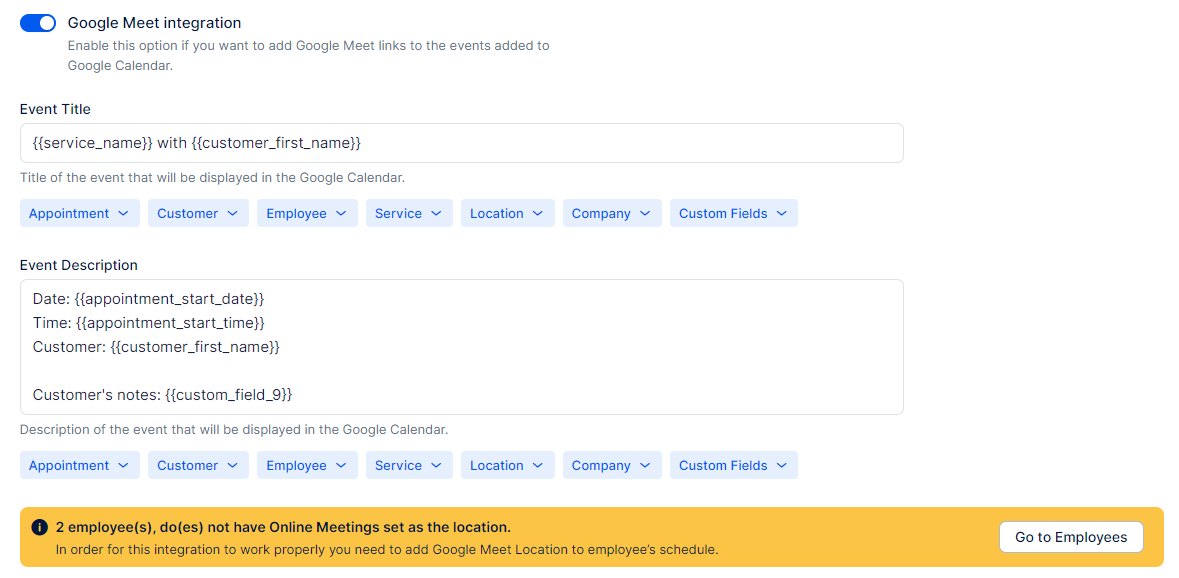
To be able to use the Google Meet integration, it needs to be enabled through the global section first. Access it through Features & Integrations -> Google Calendar and Google Meet -> “Set Up”. Scroll down a bit, and enable the “Google Meet integration” slider.
Once enabled, Trafft may show a yellow warning above the employees list, letting you know that there is a certain number of employees, connected to Google Calendar, but that do not have the Online Meetings set as the location. You can click on the “Go to Employees” button, and Trafft will take you to the Employees section, which is our next step either way.
Once you access the “Employees” section, click on the three-dots menu next to the employee you want to edit -> Edit Employee. Once you access the employee’s profile you’ll be able to change the employee’s default location and select Google Meet:
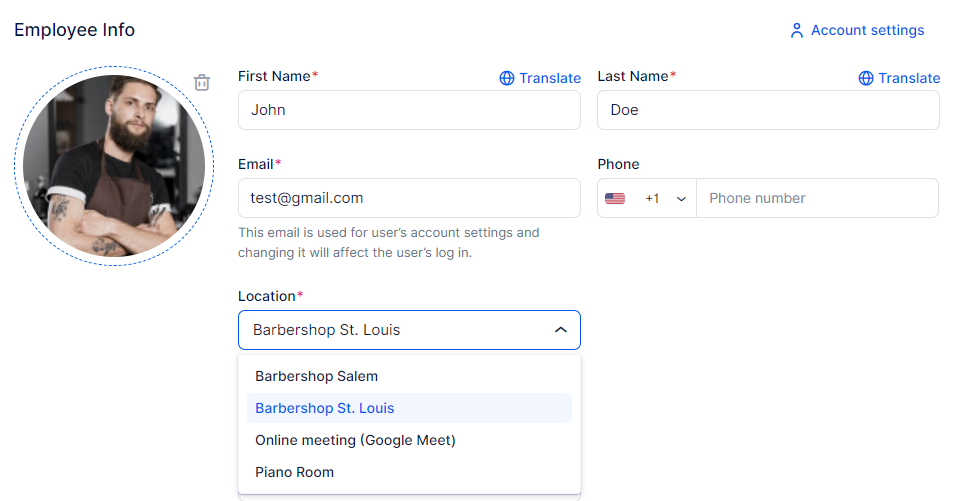
Please note that this does not guarantee that this employee is already available for booking via Google Meet, since you need to check his Working Hours first, and where the Services are offered (Online, On-site, or All Locations).
Working Hours – while you’re in the employee’s profile, click on the “Working Hours” tab and check the schedule. Since the Working Hours are designed to provide flexibility, there is a chance that saving Google Meet as the default location is not enough, since you manually defined other locations in the working hours. Just like in the screenshot below:
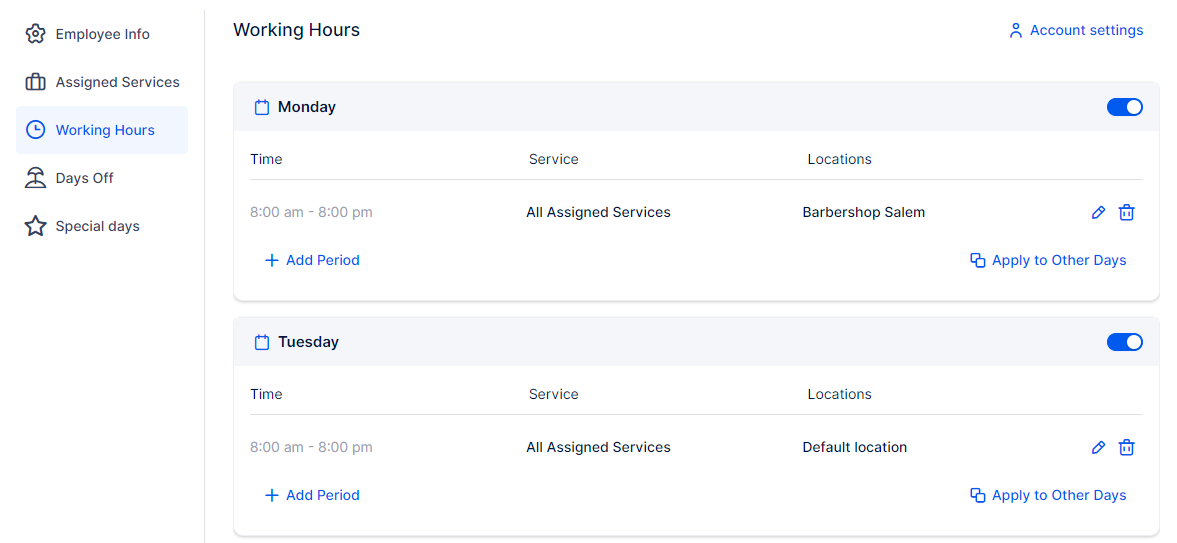
In this case, the employee will cover the Default Location (Google Meet) on Tuesdays, but Monday is configured for the “Barbershop Salem” location. Remember that you can select multiple locations during the employee’s working hours and that you can create multiple working periods so the employee covers different locations per period.
Once you verify that the Working Hours of the employee are configured correctly, we can move on to Services.
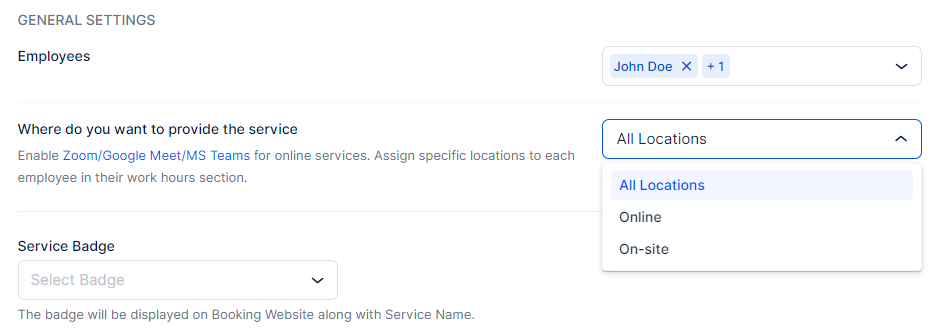
Services – Access the Services section, and edit the service you want to offer via Google Meet. Within the service details, go to the “Settings” tab located in the left section and check the “Where do you want to provide the service” option.
“Online” and “All Locations” will allow the service appointments to be held via Google Meet, while “On-Site” will prevent this from happening.
By verifying the employee’s working hours and service availability, you are ready to use Google Meet.
When scheduling new appointments, a unique Google Meet URL will be created. Group Appointments will share the same URL for all participants. If “Send Event Invitation Email” is activated in your global Google Calendar and Google Meet settings, customers can accept the invitation. This will add the event, including the Google Meet link, along with the event’s Title and Description from Trafft, to their Google Calendars.
Key Points to Remember
This basically concludes and covers the Google Calendar integration, but here are the key points that are important in understanding how it works:
Have more questions?
If you face an issue, and cannot find an answer in the documentation, feel free to submit a support ticket!