


 Agency (White Label)Getting StartedConfiguring TrafftBooking WebsiteCustom Features
 IntegrationsAdmin Views
With our integration with Zoom, the leading platform in modern enterprise video communication, you can seamlessly schedule and manage online meetings. Whether it’s audio-only, chat, or video calls, Zoom offers a versatile solution for businesses providing services online.
To set up Zoom integration, go to the Features & Integrations section in Trafft. Find Zoom and click “Enable“. Once activated, the card will refresh, showing a “Set Up” button. Click it to access the Zoom configuration page.
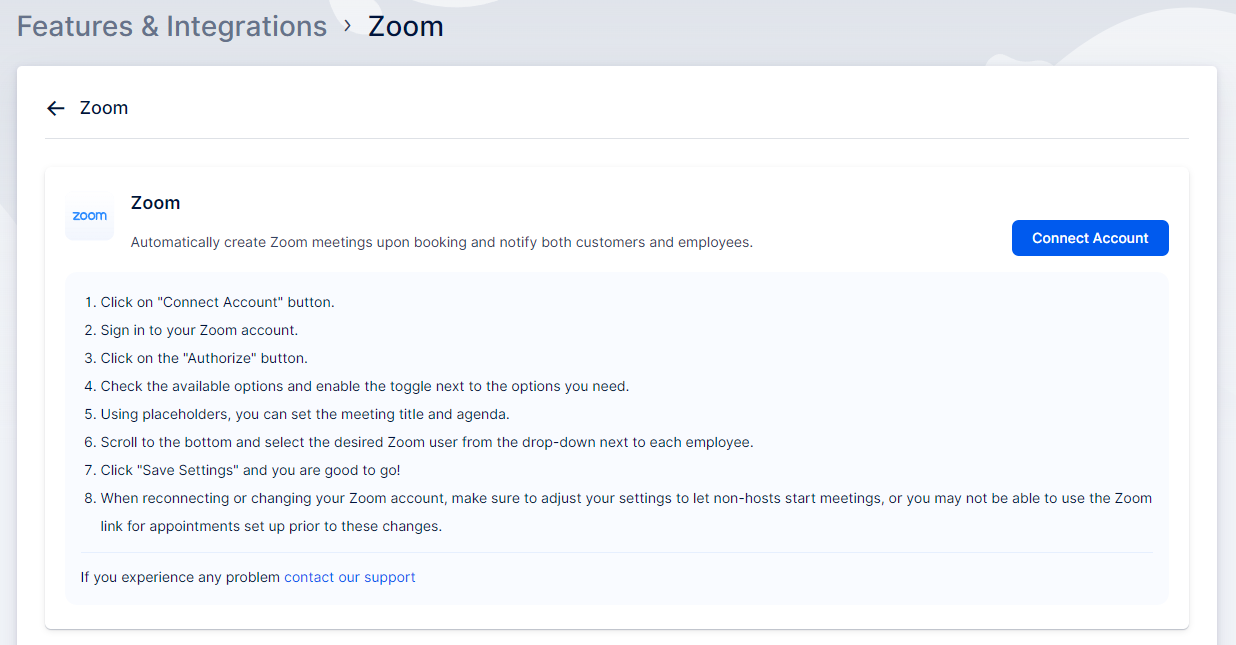
Next, a new page will open with instructions on how to link your Zoom account. Start by clicking “Connect Account” to initiate the setup process.
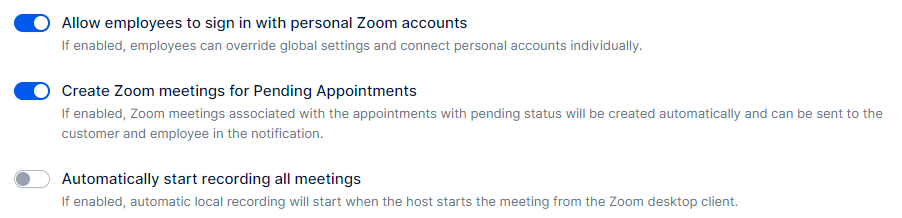
Below the connection instructions, you will find three sliders:
“Allow employees to sign in with personal Zoom accounts” – Enabling this option lets your employees connect their personal Zoom accounts with their Trafft profile. If disabled, only you can connect your employees with Zoom users on your (Admin) Zoom account. This option does not require a paid Zoom plan, but it means Zoom users and meetings won’t be centralized in one account.
“Create Zoom meetings for Pending Appointments” – This setting allows you to decide if Zoom meetings should be created for appointments with a pending status. If disabled, Zoom meetings will only be created for appointments with an approved status.
“Automatically start recording all meetings” – This option automatically begins recording meetings when the host starts the meeting from the Zoom desktop client.
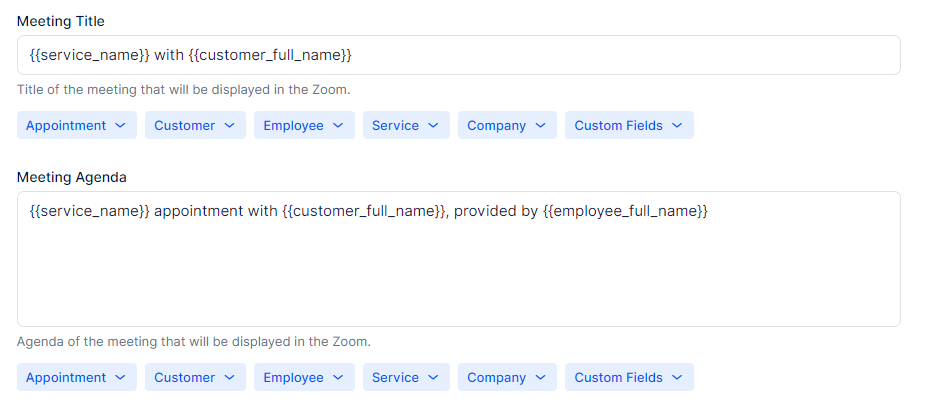
Below the sliders, you will see two more options that allow you to customize the meeting titles and descriptions:
- Meeting Title – Here, you can set a title for the meeting that will be displayed in Zoom. Below the field, you’ll find dropdowns with options to choose different placeholders. These placeholders will be replaced with actual data when the meeting is created.
- Meeting Agenda – Similar to the Meeting Title, you can set an agenda that will be displayed in Zoom. Choose from the dropdowns the information you want to include in the agenda. When the meeting is created, these placeholders will be replaced with the actual information.
At the bottom of the page, you’ll find a list of your employees. Here, you can connect each employee with their respective Zoom user. Please note that each employee account can only be connected to one Zoom user so if your employees are listed as “Users” in your Zoom account, you will be able to select them.
Alternatively, if you enable the option “Allow employees to sign in with personal Zoom accounts”, your employees will have the option to connect their personal accounts. To do this, the employee needs to log into their own Zoom Account through the Account Settings.
Once the employee’s account is created by the Admin or the Superadmin, their login needs to be enabled. This process is covered in detail in the Users and Roles documentation section, so we will provide a summary here.
To enable employees to log into their accounts on Trafft, follow these steps:
- Access the “Settings” section located in the lower left corner of Trafft’’s admin page.
- In the new page that appears, click on “Users and Roles“.
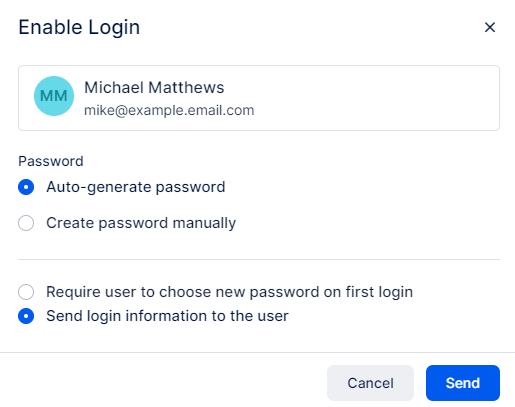
- Next to the employee you want to enable the login for, click on the three-dots menu -> Enable Login:

In a new popup that appears, you can choose whether Trafft will auto-generate a password or if you prefer to create a password manually for this employee. Below that, you can also define whether the employee will be required to choose a new password on the first login or if you’ll only send the login information to the user.
After the employee receives the login information, they can access their Trafft account. From there, instruct them to navigate to Account Settings to link their Google account with their employee account in Trafft.
To access the Account Settings, click on the name in the top right corner:

This will open a new window where the logged-in employee can update their personal information, change their password, and manage their schedule (if their user role allows). Most importantly for this integration, they can access the Integrations section and log into their personal Zoom account.
Once the Integration section is accessed, click on “Zoom Calendar“.
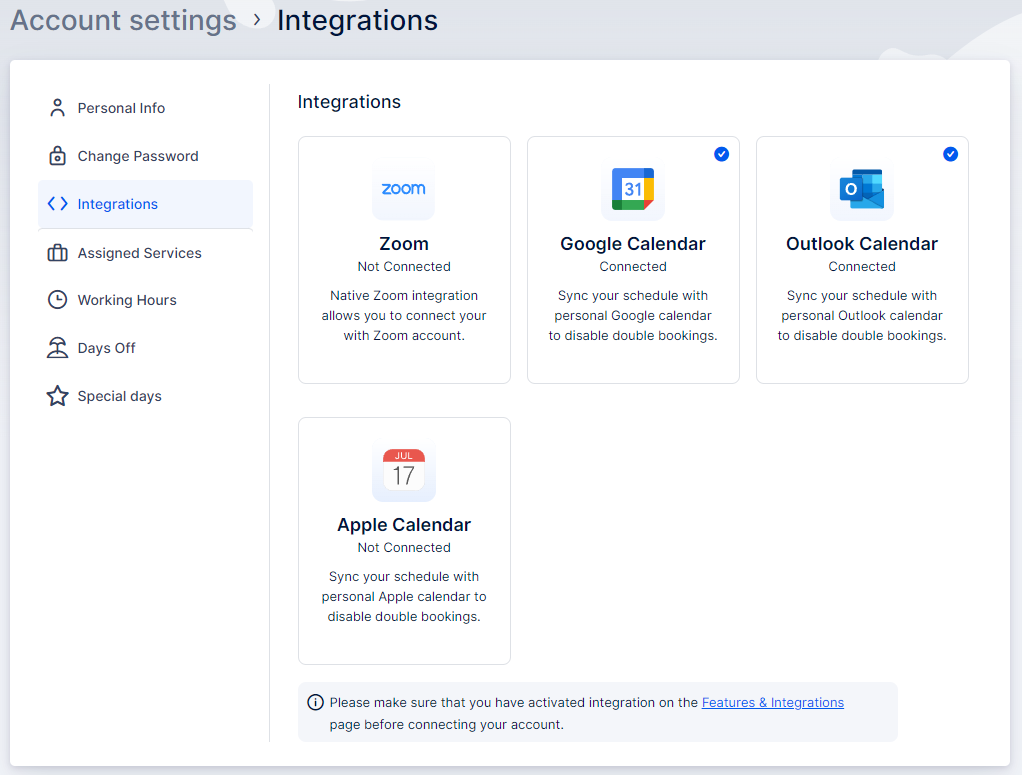
The only option available here will be the “Connect Account” option. The employee needs to click it to establish the connection between his/her Zoom and Trafft profiles.
Once the account is connected, the Account Settings page in Trafft will refresh, showing the “Disconnect Account” option, and a warning indicating that the employee still doesn’t have Zoom configured during working hours.
This means that the employee (or the admin) would need to edit the working hours and include “Zoom” as the location.
Also, access the Services section, and edit the service you want to offer via Zoom. Within the service details, go to the “Settings” tab located in the left section and check the “Where do you want to provide the service” option.
“Online” and “All Locations” will allow the service appointments to be held via Zoom, while “On-Site” will prevent this from happening.
Setting up notifications with Zoom Link
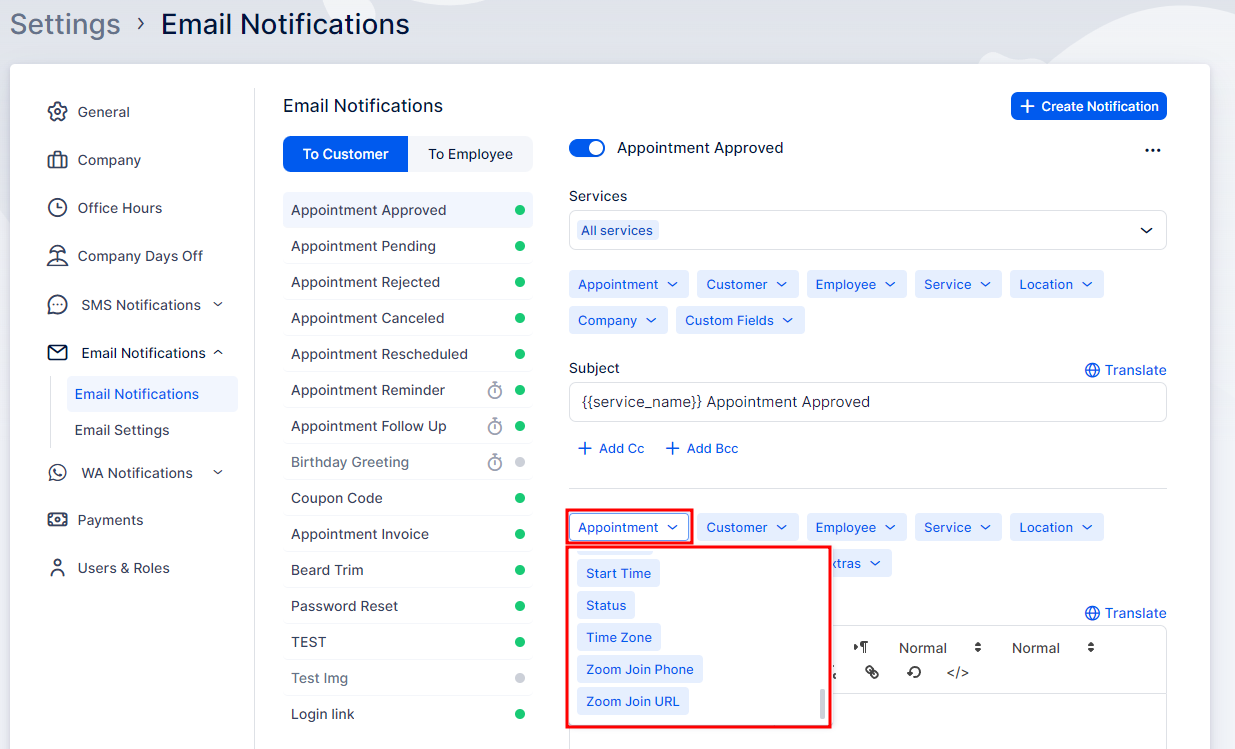
Once you’ve configured your Zoom settings, there is one final step if you want your customers and employees to receive links to the Zoom meetings through notifications. Navigate to Settings, then open Email Notifications. Within the Appointment placeholders (found in the Appointment dropdown), you will see options to include “Zoom Join URL” and “Zoom Join Phone” in both customer and employee notifications, while the “Zoom Host URL” (required by the employee to start the meeting) only in the employee notifications. After configuring these templates, click Save Settings to save your changes.
Finding your link to the Zoom meeting
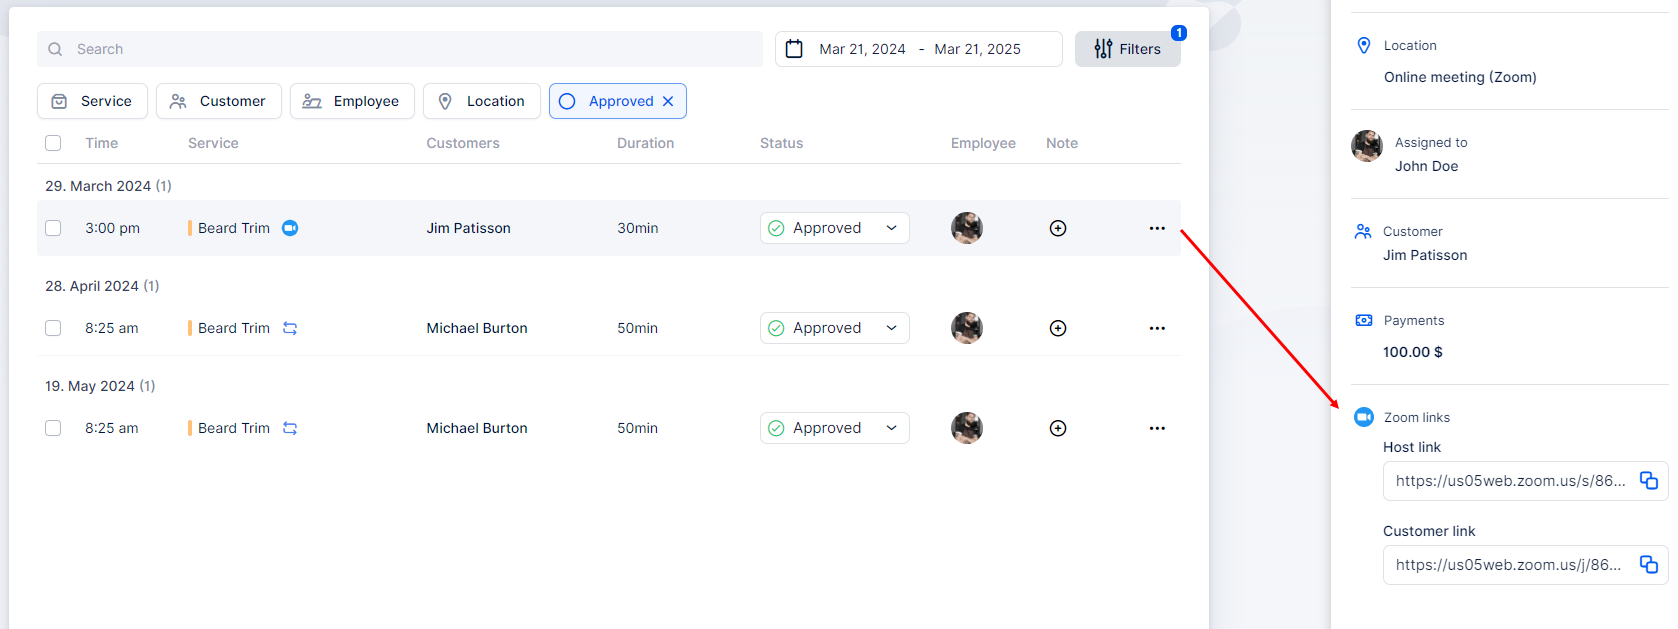
In addition to sending the Zoom link in notifications, you can also access it within the appointment details. On the Appointments page, you can easily distinguish between online and offline appointments by looking at the list. Online appointments will have a camera icon next to the service name. Simply click on the appointment with the camera icon, and in the appointment details, you’ll find both the Host and Join links readily available for easy access.
Uninstalling the Trafft App from your Zoom Account
If you’d like to uninstall the Trafft App from your Zoom account, follow these steps:
- Log in to your Zoom account and navigate to the Zoom Marketplace.
- Search for “Trafft” and click on the app, or navigate to your installed apps via Manage > Installed Apps.
- Next to the Trafft app, click “Uninstall”.
- Confirm the dialogue and click “Uninstall” again.
After completing these steps, Trafft will be uninstalled from your Zoom account.
If you need additional help or technical support, please contact us at support@trafft.com or via the support beacon in the bottom right corner of the application.
Have more questions?
If you face an issue, and cannot find an answer in the documentation, feel free to submit a support ticket!