


 Agency (White Label)Getting StartedConfiguring Trafft
 Booking WebsiteCustom FeaturesIntegrationsAdmin Views
Within the Customize section, under General/Account Settings, you are presented with three distinct options to tailor your booking experience:
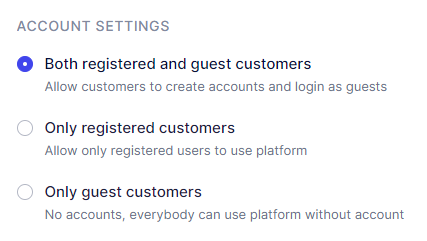
By selecting either of the first two options, you empower your customers to create profiles and log into your booking website.
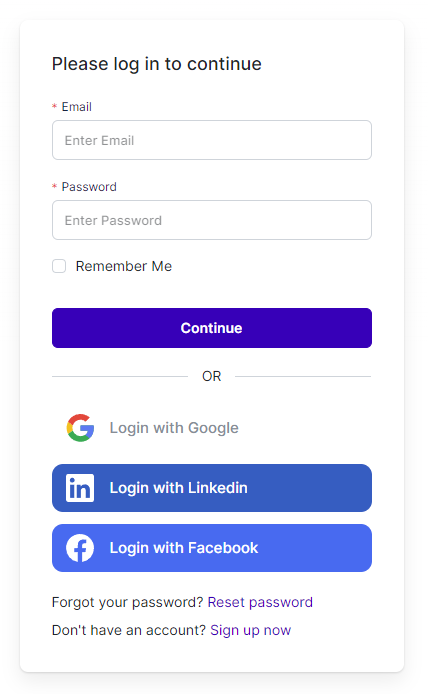
Upon visiting your booking website, customers can click on the “Login” button located in the upper right corner to either create their profile or log into it. They can also create their profile through the booking form during the final step where customer information is populated.
At the login screen, customers have several options to access their accounts:
- Email and Password: Customers can log in using the email address and password they used to create their profile.
- Social Media Integration: If enabled, customers can also log in using their Google, LinkedIn, or Facebook accounts if they are linked to their Trafft profiles.
- Registration: New customers without an account can easily register by clicking the “Register” option.
- Password Reset: For those who have forgotten their password, a “Forgot Password” option is available to initiate the password reset process.
After logging in, customers are directed to the “My Bookings” tab, their personalized dashboard displaying appointments within a specified date range, if any are scheduled.
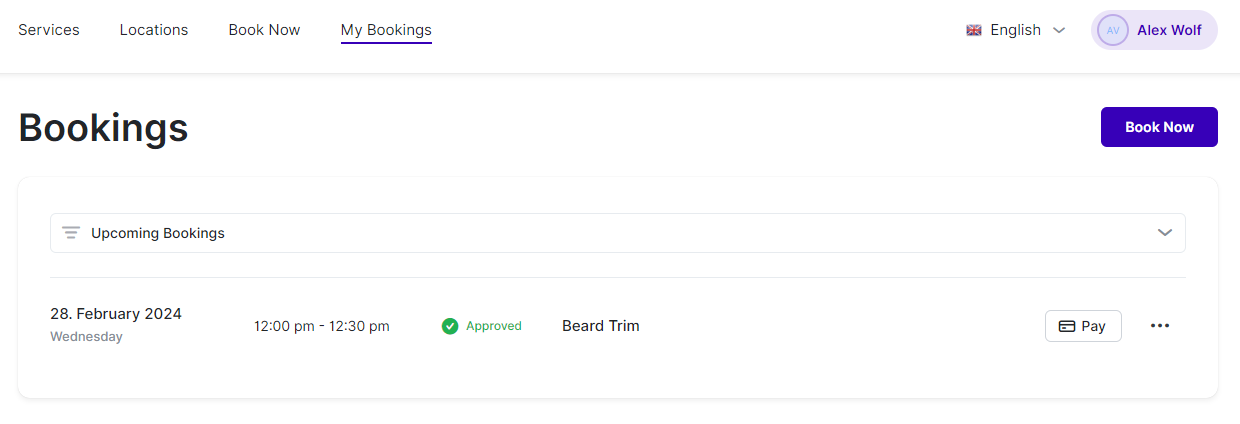
On the “My Appointments” page, customers have convenient tools to manage their bookings. They can filter appointments and see all their appointments, only past appointments, or only upcoming appointments. For online appointments, customers will see a Google Meet and/or Zoom icon next to the service name, enabling direct access to the meeting platform.
Each appointment has a three-dots icon. Clicking on this icon provides options to “Cancel” or “Reschedule” the appointment, giving customers flexibility in managing their schedules.
For customers who have made a deposit or chosen the “On-Site” payment method, but you offer online payments configured in your admin section, the “Pay” button will be available. This button is located next to the three-dots menu associated with each appointment.
Clicking on the “Pay” button opens a page where customers can select from your configured online payment methods to complete their payment for the appointment. This streamlined process ensures smooth and convenient transactions for both you and your customers.
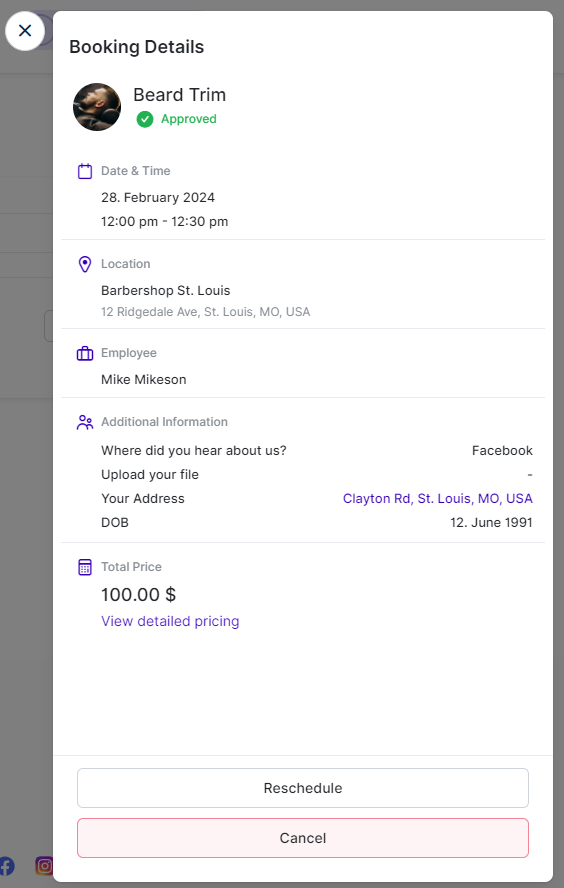
Clicking on any appointment opens a sidebar on the right-hand side, displaying comprehensive details about the selected appointment. The sidebar includes the service name, along with a Google Meet/Zoom icon for online appointments. Customers can easily access the online appointment by clicking on the icon or copying the link provided next to it.
In the upper right corner of the dashboard, customers have the option to log out or access their User Settings. This dashboard provides a convenient overview of upcoming appointments, allowing customers to manage their bookings with ease.
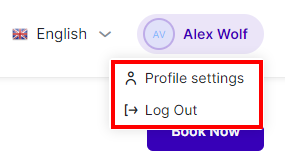
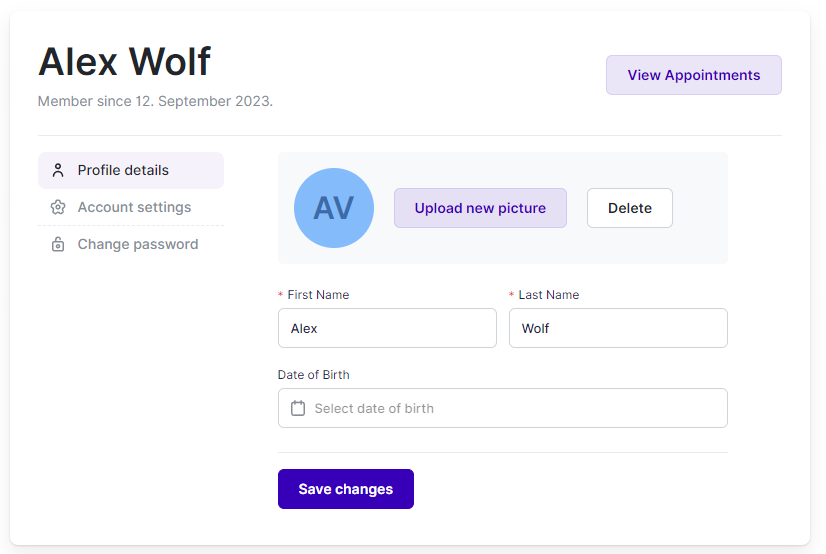
When customers click on “User Settings,” they will be directed to their profile details page. Here, they can view and modify the basic information associated with their profile (update their name, date of birth, and upload a profile picture).
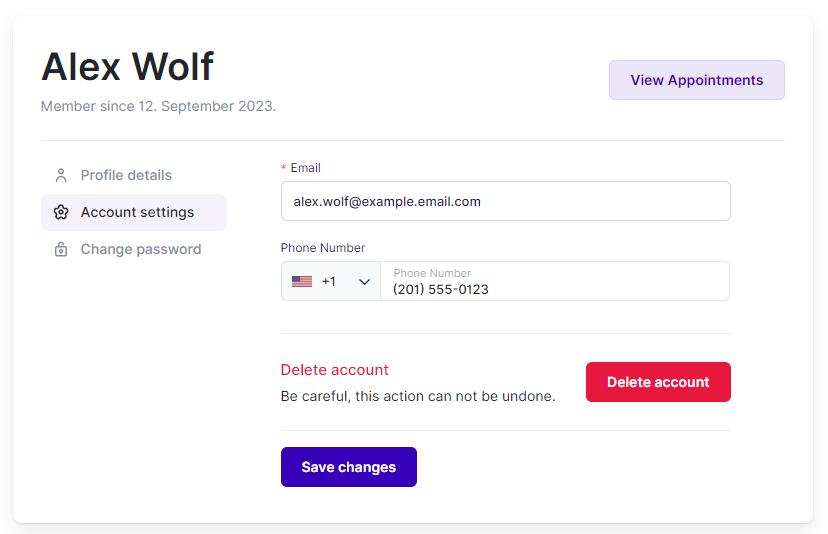
Below the Profile details section, customers will find Account Settings. Here, they can add or update their email addresses and phone numbers. Additionally, customers have the option to delete their profile entirely if they choose. This feature is designed to align with data privacy regulations, providing customers with control over their personal information.
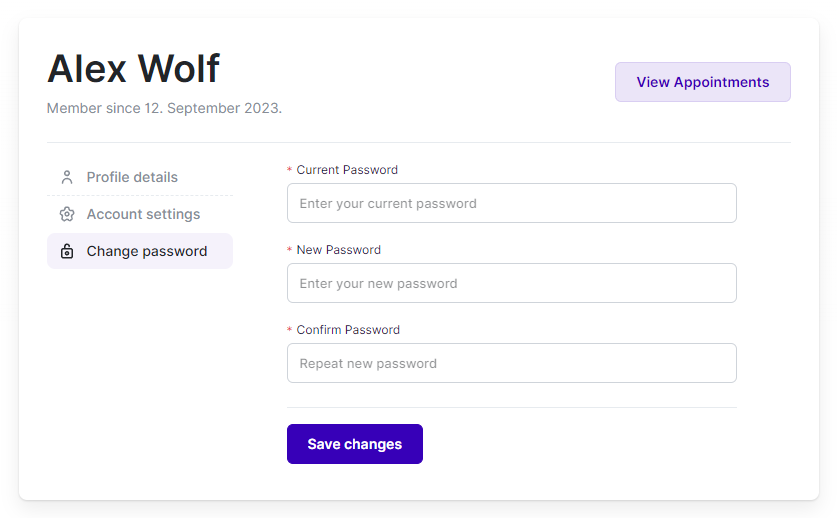
The last tab in User Settings is the “Change Password” tab. Here, customers can update their passwords to enhance account security. This feature allows customers to manage and maintain the security of their accounts easily.
Have more questions?
If you face an issue, and cannot find an answer in the documentation, feel free to submit a support ticket!