


 Agency (White Label)Getting StartedConfiguring Trafft
 Booking WebsiteCustom FeaturesIntegrationsAdmin Views
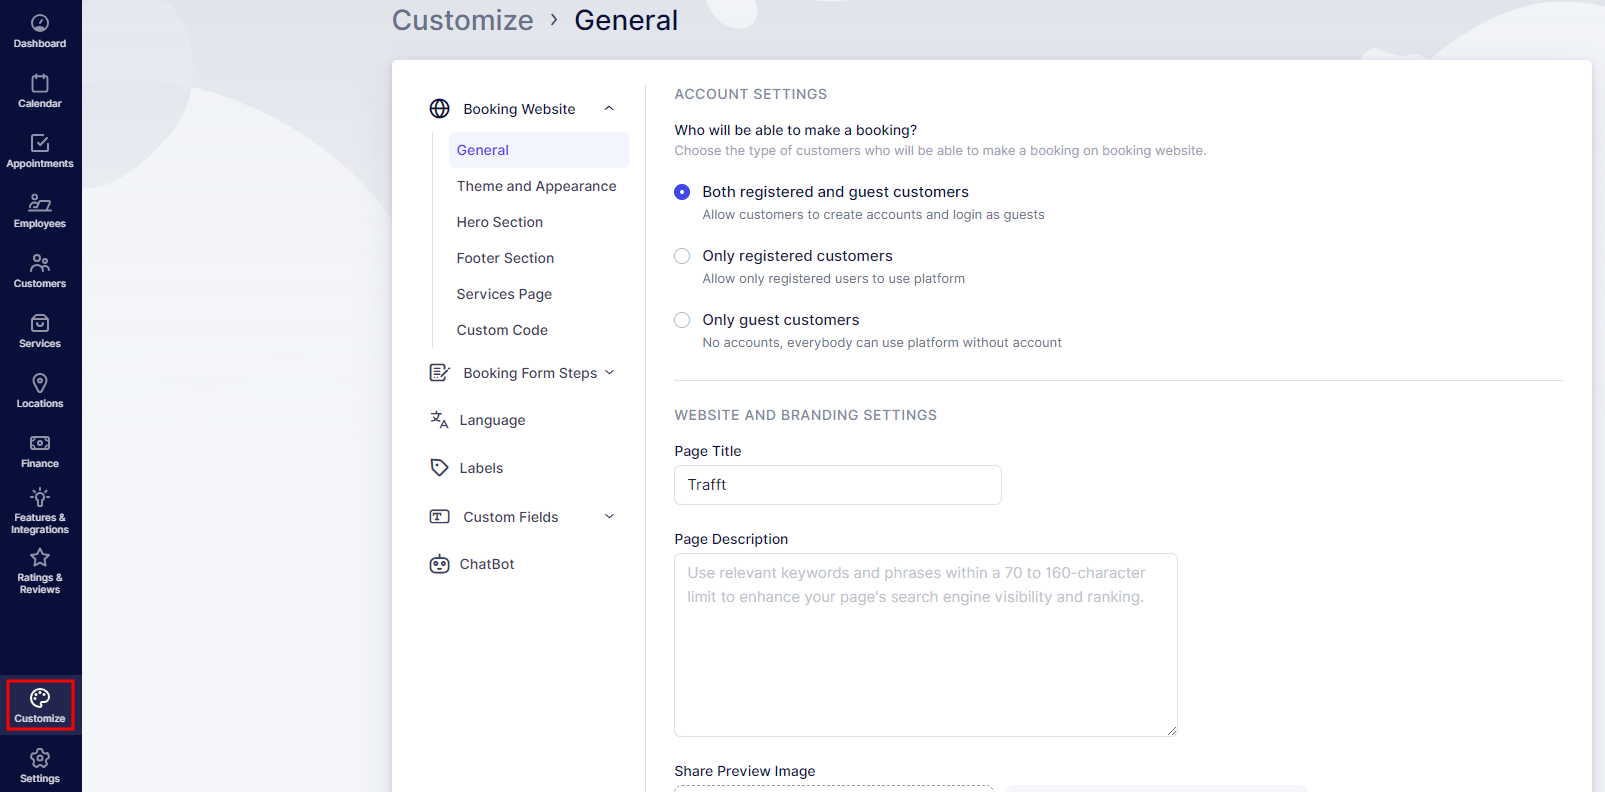
To tailor your booking experience, navigate to the left sidebar and click on the “Customize” button.
This section covers the customization of booking options (form settings, customer account settings, employee selection settings and logic, language used, and labels available for modification).
If you’re looking for Design Customization please click here.
On the Customize page, you’ll find five sections, divided into subcategories. The categories linked below are the ones covered in this article. For all other categories, please visit this page.
- Booking Website, divided into:
- General
- Theme and Appearance
- Hero Section
- Footer Section
- Services Page
- Custom Code
- Booking Form Steps, divided into:
- Language
- Labels
- Custom Fields (please note that this section is a custom feature that needs to be enabled before it appears), divided into:
- Customer
- Appointment
If you enable the ChatBot feature, the settings for the bot will also appear below “Custom Fields”, as shown in the screenshot above.
Booking Website
General
When you navigate to the Customize section, the “Booking Website” category will automatically expand, presenting you with the General subsection. Within this section, you will find two key settings: Account Settings and Website and Branding Settings.
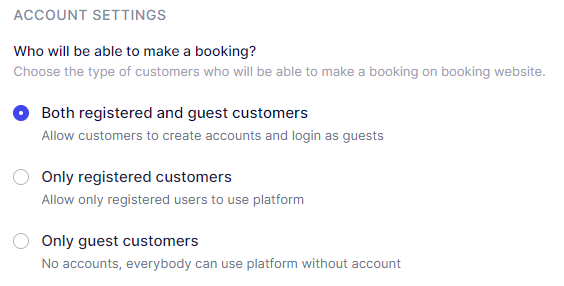
Account Settings: This feature allows you to define your customer base within Trafft. You have the option to specify whether:
- All customers can book appointments (both registered and guest users),
- Only guest users are permitted to book, or
- Only registered users are allowed to book.
Registered users gain access to the Customer Panel by logging into the “Log In” section, conveniently located at the top right of the screen. This section is automatically added when you enable one of the registration options. On the other hand, guest users can view and modify their appointments via email.
This flexibility ensures that you can tailor the booking experience to your preference, whether you prioritize user registration or prefer to accommodate guest bookings with minimal friction.
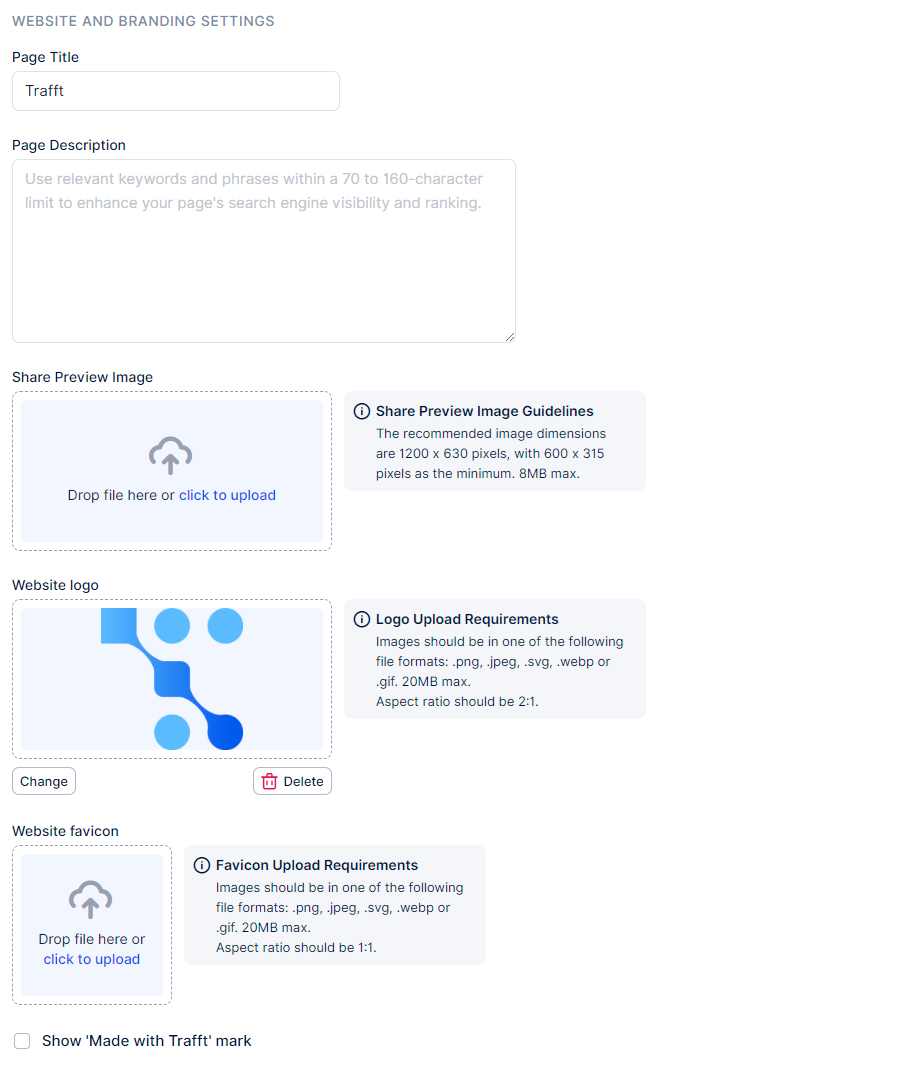
The Website and Branding Settings offer a range of customization options for your booking website:
- Title: Name your booking website to reflect your brand.
- Description: Enhance the visibility of your website on search engines by adding a description. This description helps search engines understand the content of your website, potentially improving its ranking in search results.
- Share Preview Image: When someone shares the link to your booking website, a preview image is displayed. You can set a custom image here to represent your website when shared on social media or messaging platforms.
- Website Logo: Customize the header and footer of your booking website by adding your company logo. The logo will appear prominently in both sections, reinforcing your brand identity.
- Favicon: Personalize the browser tab of your booking website with a favicon. This small icon appears next to the website title in the browser tab, making it easily recognizable to visitors.
- “Made with Trafft” Mark: Depending on your plan, you have the option to hide the “Made with Trafft” mark on your website. This allows for a cleaner, more professional appearance without external branding.
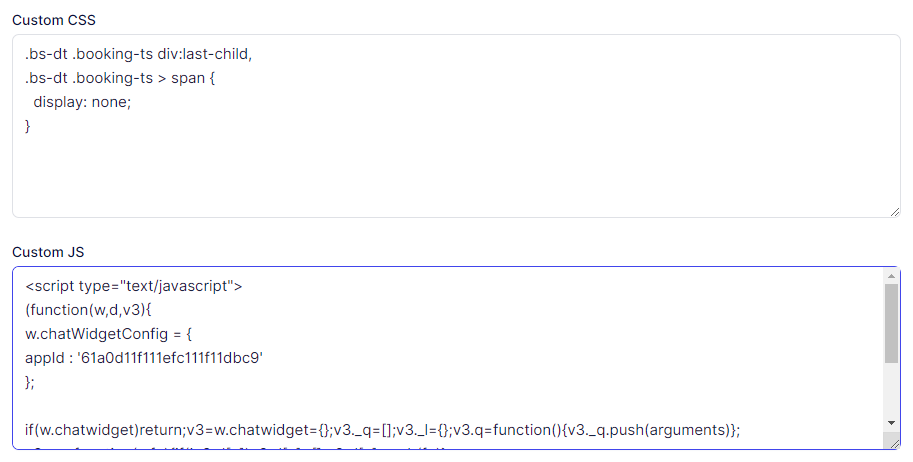
Custom Code
Within this section, users have the ability to insert their personalized CSS or JavaScript code directly into their booking website.
The Custom Code feature provides a versatile toolkit for users to enhance their booking website. Whether you’re looking to integrate custom widgets, adjust the layout to align with branding guidelines, or seamlessly incorporate third-party tools, Custom Code empowers users to fully customize the appearance and functionality of their booking website. Let’s explore how you can leverage custom code to craft a distinct and tailored booking experience for your customers.
For detailed information about Custom Code and to explore a variety of examples, please visit this page.
Booking Form Steps
General
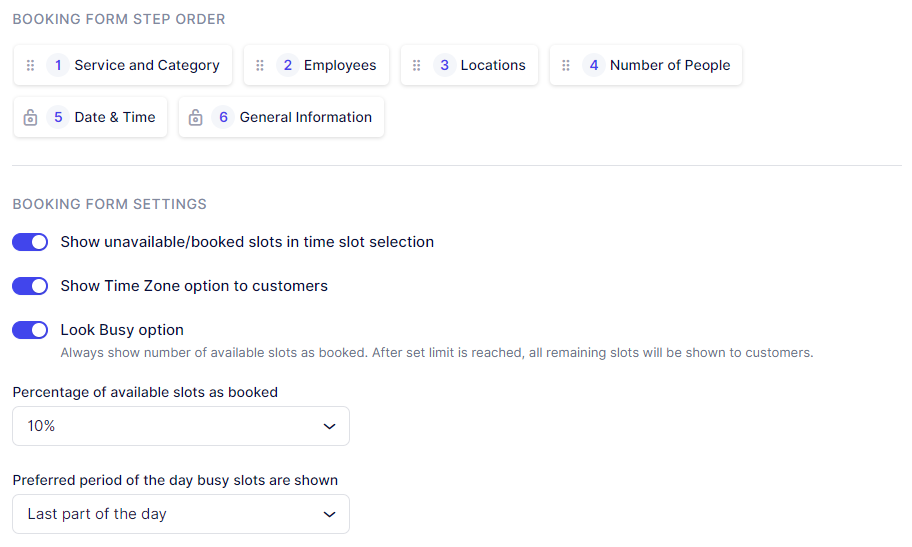
The “General” subcategory of Booking Form Steps settings offers flexibility in organizing the steps within the booking form and customizing display options. This includes the ability to show unavailable time slots, adjust the time zone display, and activate the “Look Busy” feature.
With the Booking Form Step Order section, you can easily rearrange the steps according to your preference by dragging and dropping them within the booking process. It’s important to note that the “General Information” step, where customers enter their details, remains fixed as the last step and cannot be repositioned.
If you enable the Recurring Appointments feature, the “Date & Time” step will automatically be placed as the fifth step in the process. This step’s position cannot be changed, as it is essential for setting up recurring appointments and requires all preceding steps to be completed.
Activate the “Show unavailable/booked slots in time slot selection” option to display already booked time slots on your booking form during the Time Selection step. This feature presents the booked slots as unavailable, allowing customers to view them without the ability to book those slots.
The “Show Time Zone option to customers” is particularly useful for businesses operating in multiple time zones. This setting adds a time zone field on the front end, above the date/time selection, automatically detecting and displaying the customer’s time zone based on their device’s physical location. For example, if an employee works in UTC and the customer is in UTC+4, the appointment time will appear differently for each: 07:00 for the employee and 11:00 for the customer, reflecting the 4-hour time difference. Note that if a customer’s city is not automatically detected, it is not an issue as the library may not have a complete list of all cities; what’s important is that the time zone is accurately displayed.
To create the appearance of a busier schedule on your booking forms, activate the “Look Busy option“. This feature allows you to hide a specified portion of your time slots on the booking form, giving the impression of a fuller schedule. When combined with the “Show unavailable/booked slots in time slot selection” option, a segment of your time slots will be displayed as booked on the booking website. In the “Percentage of available slots as booked” field, enter the percentage of your day that you want to appear as booked on the form. Additionally, choose between the First or Last part of the day in the “Preferred period of the day busy slots are shown” option, from which the time slots will be extracted and displayed as busy.
Employees
In the Employee Selection Settings, you can decide whether you want to provide clients with the option to choose an employee for their appointment. You can also establish the logic for selecting employees if a customer hasn’t made a specific choice. By enabling the “Customer can choose an employee” option, clients can select a specific employee for their booking or opt for the “Any Employee” choice, which will automatically assign an employee based on the selection logic.
If you check the “Hide “Any Employee” option from selection,” customers won’t see the “Any Employee” option on the booking website and must choose a specific employee. To completely conceal the employee selection step on the booking website, you can check the “Hide employee selection” option.
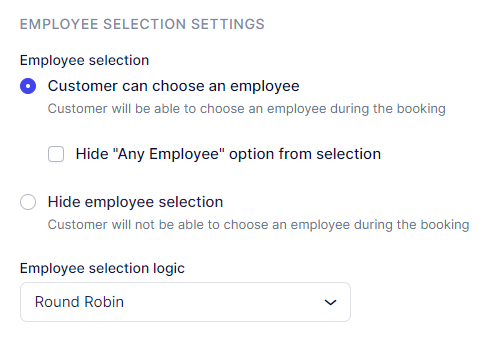
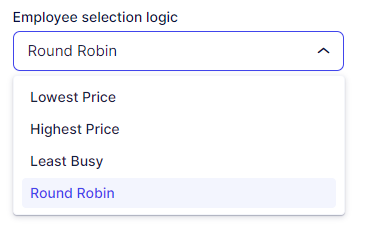
If a customer opts for the “Any Employee” choice on the booking website or neglects to choose a specific employee, you can define the logic for assigning an employee under the “Employee selection logic” dropdown. You have several options to choose from, including Round Robin, which assigns employees in a circular order, as well as options based on the Least Busy employee, the employee with the Highest or Lowest price.
Customers
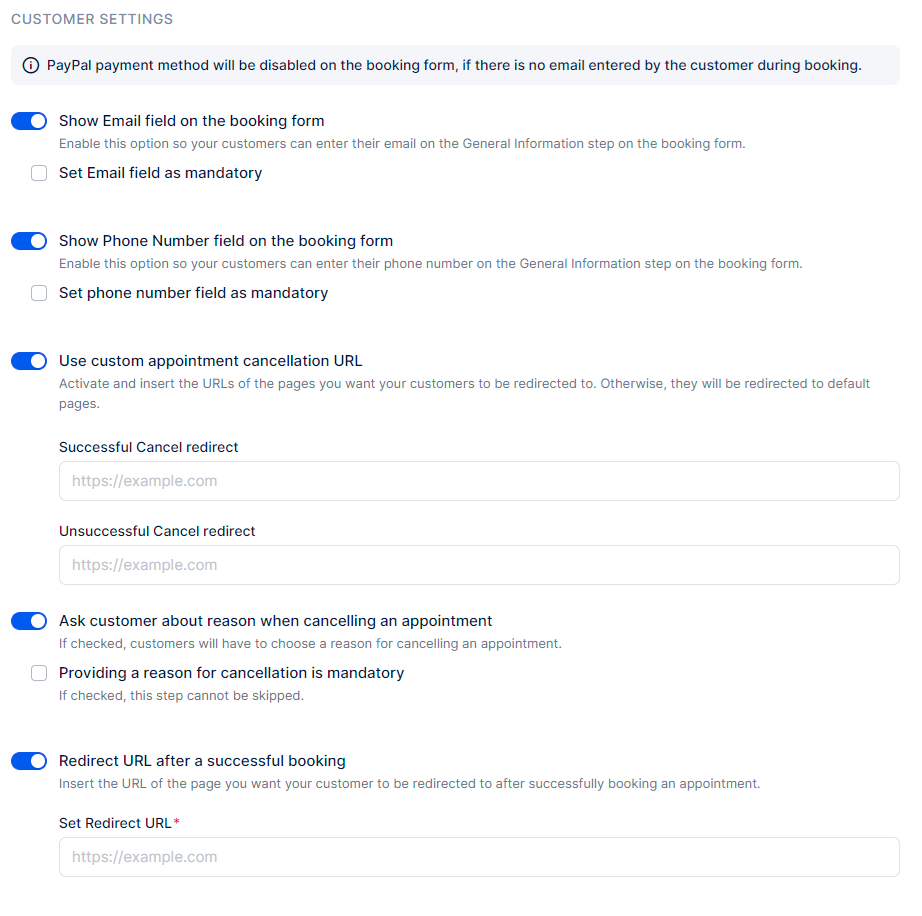
In the Customer settings, you have control over the following options:
- Show Email Field On The Booking Form: Enable this option to allow customers to input their email address during booking. You can also make this field mandatory, ensuring customers provide an email. Please note that this setting applies to both the back-end and front-end of the booking process. If the email field is mandatory, customers cannot proceed without entering their email. If it’s optional, they have the choice to skip it. Additionally, if a customer doesn’t enter an email address or if the field is hidden, PayPal (if configured) will be disabled as a payment method.
- Show Phone Number field on the booking form: Similar to the Email field, you can choose to display or hide the phone number field. Additionally, you can mark the “Set phone number field as mandatory” option, making it a required field that customers must fill out.
- Use Custom Appointment Cancelation URL: After a customer cancels (or fails to cancel) an appointment, you may want to direct them to custom pages with specific messages. Here, you can enter two URLs: one for successful appointment cancelations and another for unsuccessful ones. These URLs redirect customers to external websites you own, where you have designed the pages. Please note that Trafft does not configure these pages; the URL fields are provided for redirection purposes.
- Ask customer about reason when cancelling an appointment: You can prompt customers to provide a reason when canceling an appointment. This option can also be set as mandatory if desired.
- Redirect URL after a successful booking: Similar to the “Cancelation Redirect” URLs mentioned earlier, this setting allows you to specify a custom page for customers to be directed to after successfully booking an appointment. This page can include a personalized message or information relevant to the booking.
Language
In the Language section, you have the option to translate the booking website and invoices into different languages using the “Languages” dropdown. Currently, the available languages include Arabic, Brazilian Portuguese, Bulgarian, Chinese (Traditional), Chinese (China, Simplified), Chinese (Taiwan, Simplified), Czech, Danish, Dutch, English, Finnish, French, German, Greek, Hebrew, Hungarian, Italian, Japanese, Korean, Malay, Norwegian, Polish, Portuguese, Romanian, Russian, Serbian, Slovak, Slovenian, Spanish, Swedish, Ukrainian, and Vietnamese.
Please Note that the back-end (Admin section) of Trafft is currently offered only in English, Czech, Serbian, and Spanish. This is configured in the General Settings page.
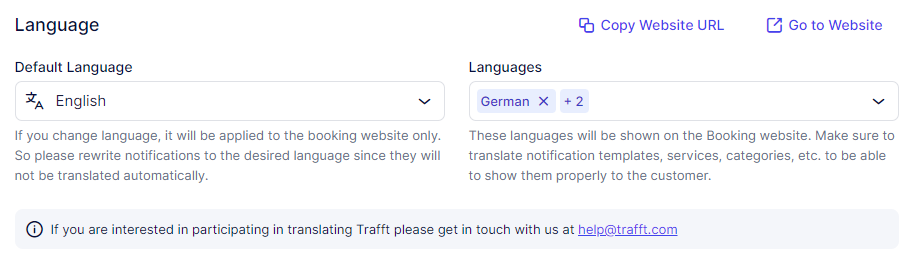
Depending on whether you’ve enabled Multilingual Support in the Features & Integrations section, the Language Customize options will appear differently:
- When Multilingual Support is disabled, you can only configure the language on the booking website:
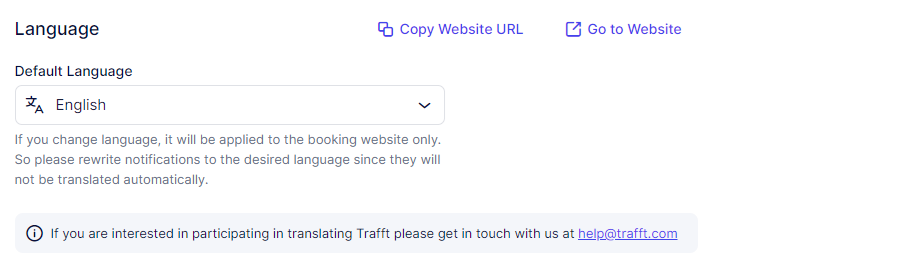
- With Multilingual Support enabled, you can configure the default website language and add additional languages for customers to choose from the language drop-down menu on the booking website.
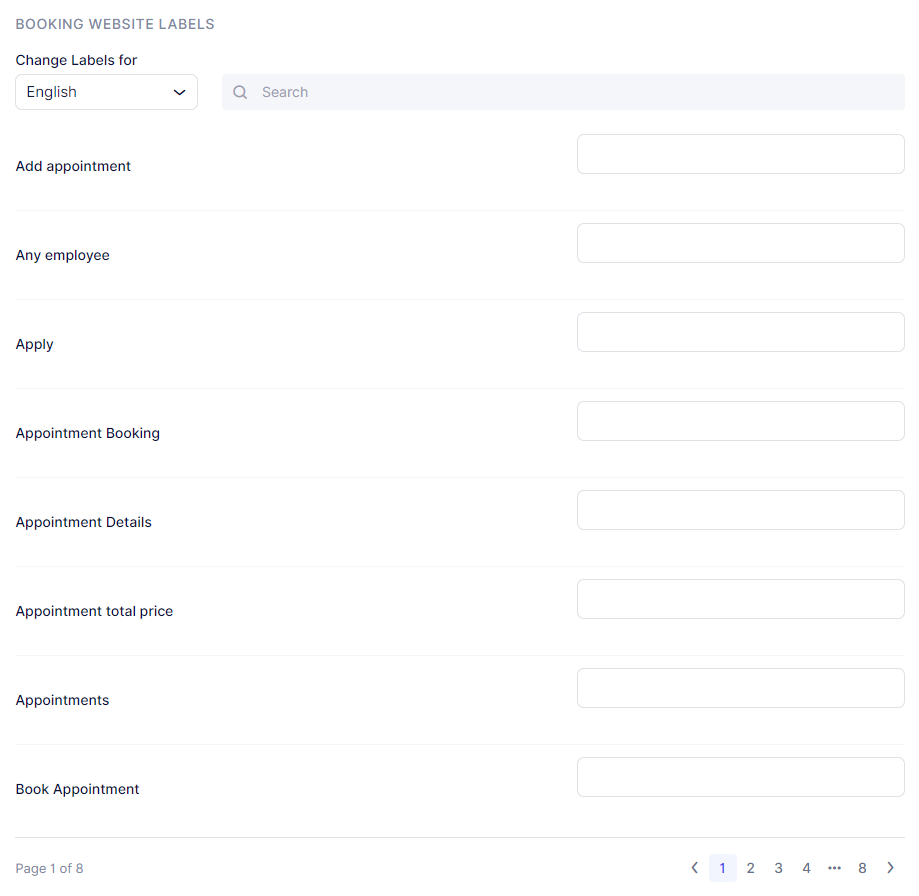
Labels
You have the option to customize the labels on your booking form according to your preferences. If you leave these fields blank, the default labels will be used. Currently, there are almost 60 labels available for modification, and we regularly introduce new ones. Feel free to reach out to us if there’s a specific label you need that is not yet available.
In the “Change Labels for” drop-down, you can select languages you previously added in the Languages section, so you can change the labels for each language individually.
Custom Fields
Within the Custom Fields section, you have the ability to configure additional fields for both the Appointment and the Customer. These fields are valuable when you need to gather more specific information about your customers and their bookings.
Adding custom fields to the Appointment form allows you to request additional details from customers when they schedule an appointment. This could include preferences, special requirements, or any other relevant information necessary for the appointment.
On the other hand, custom fields for the Customer form enable you to collect specific information about your customers themselves. This could be anything from contact details to specific preferences or important notes.
For detailed instructions on setting up and managing these custom fields, please refer to the Custom Fields page.
This page provides comprehensive guidance on creating and utilizing custom fields to tailor your booking process to your unique needs.
Chatbot (Beta)
Introducing the Chatbot feature in Trafft! Our Chatbot is designed to streamline your booking process, offering a user-friendly interface for customers to schedule appointments effortlessly. With the Chatbot, customers can interact in real time, receive instant responses to inquiries, and make bookings seamlessly. Enhance your customer experience and boost efficiency with Trafft’s Chatbot. To read more about this feature, please visit this page.
Have more questions?
If you face an issue, and cannot find an answer in the documentation, feel free to submit a support ticket!