


 Agency (White Label)Getting Started
 Configuring TrafftBooking WebsiteCustom FeaturesIntegrationsAdmin Views
Locations in Trafft are designed for businesses with operations across various places. The option to have multiple locations is a custom feature in Trafft, which is activated by default during your trial period.
By default, Trafft starts with a single location, which can be used for businesses operating from one place. If your business is online-based or you provide services at a single location, there’s no need to worry. You can use Trafft without configuring multiple locations. Simply enter your company’s address in the Company Settings, and it will serve as the single location for your business.
Trafft also supports Zoom, Microsoft Teams, and Google Meet as online locations. However, if you require multiple physical locations, this article will guide you through creating and managing multiple locations within the Trafft booking software.
During your Free Trial period, the “Locations” feature will be automatically enabled. For existing customers who need to activate this feature, follow these steps:
- Access the Features & Integrations section.
- Locate the “Multiple Locations” card.
- Click on “Enable“. The card will refresh, displaying the “Disable” button once activated. This indicates that the feature is now ready to be used and will appear in the left-side menu.
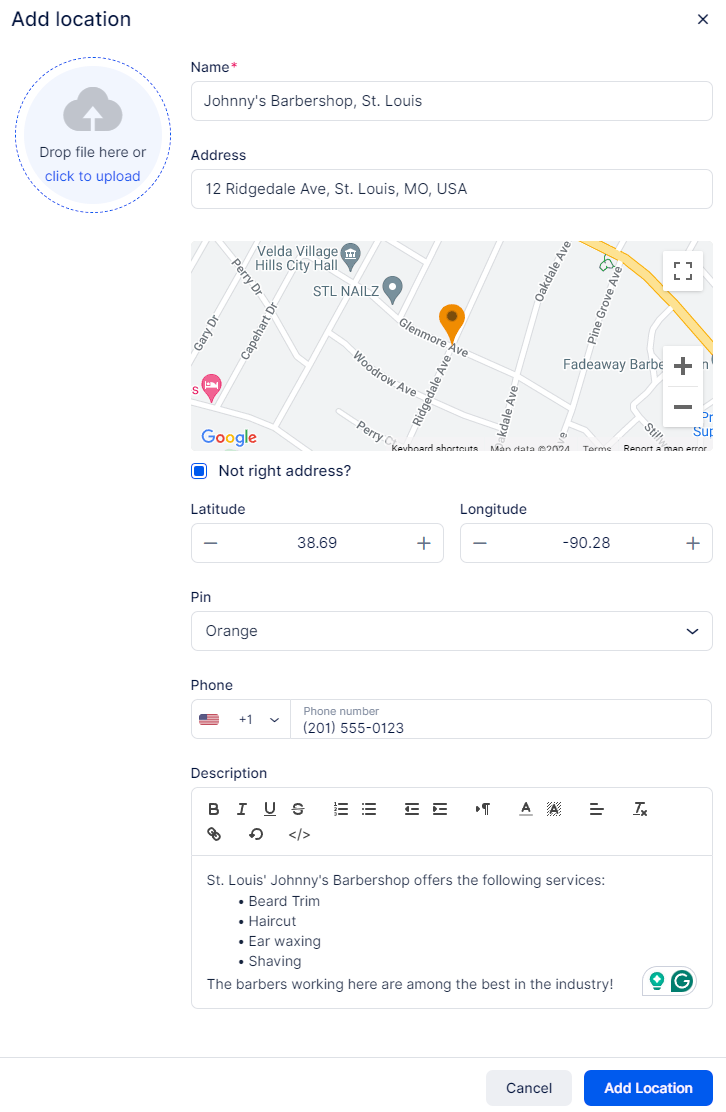
Once you access the Locations section, you’ll be able to create your first location. Start by clicking the “+ Add Location”. This will bring up a popup modal where you can define the location by populating the given options and fields:
- Image: Upload the image of the location. This will help your customers identify the location, but it can also have a descriptional purpose. You can click on the circle to upload the image, or you can simply drag it and drop it into the circle.
- Name (mandatory): Provide the name of the location. For example “Johny’s Barbershop, St. Louis”.
- Address: Provide the address of the location. When you start typing the address, Google Maps will present you with suggestions, so you can simply click on the correct address once it pops up. The map below should place the pin on the correct location, but you can drag it to the correct location if it fails. Below the map, you can also check the “Not right address?” checkbox, which will provide you with two additional fields, where you can enter the exact latitude and longitude of your location.
- Pin: In the dropdown, you’ll be able to select the pin color and you can pick from 8 different colors at this time.
- Phone: Enter the phone number of the location.
- Description: Provide a brief description of the location and the services that are offered on it.
Once the location has been added, a “Success” prompt will be displayed, and you’ll have the option to simply close it, or to access additional settings of the location by clicking the “Go to Location” button.
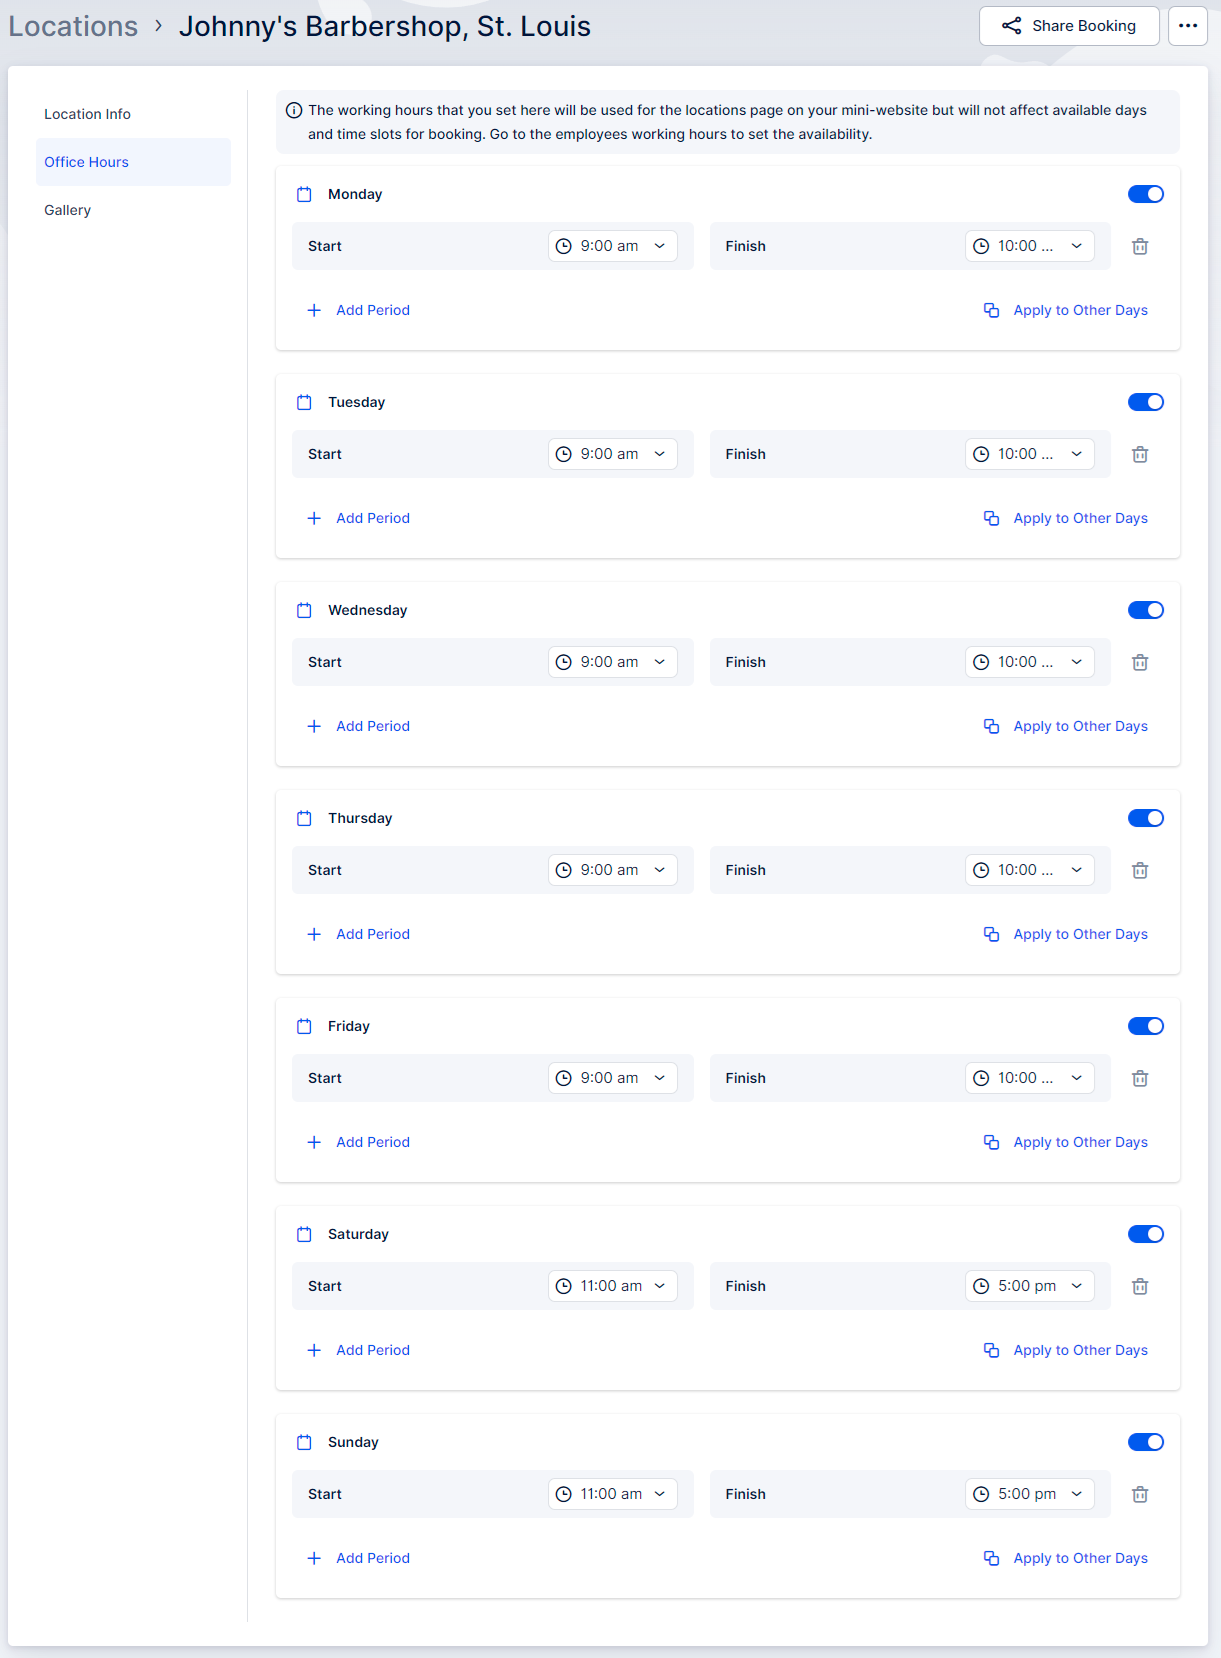
If you use this button, Trafft will take you to the detailed overview of the location where you’ll be able to see and modify the information you entered when you added the location, but you’ll also see two tabs on the left:
- Office Hours
- Gallery
The Office Hours tab enables you to set the location’s operating hours, which will be displayed on the location’s page of your mini-website. These working hours are designed to showcase when the location is open but do not directly affect the availability of services.
To configure the availability of services, you will need to edit the Employee’s Working Hours. This allows you to define which location(s) the employee will cover during their working hours. By aligning employee schedules with specific locations, you ensure that services are available and bookable at the correct times and places.
The Gallery tab allows you to enhance the location’s profile by adding a gallery of images related to the location. These images will be showcased to customers during their booking process once they select the location.
To add images to the gallery:
- Click on the field for uploading photos.
- Upload images from your files to create an engaging visual representation of the location.
Once you have finished entering all location details, remember to click the “Save Changes” button that pops up at the bottom of the screen. This ensures that the location information is saved and displayed correctly on the page for customers to view and select.
Working with the Locations list
- Office Hours: View the operating hours of the location.
- Address: The address is displayed on a map for easy reference.
- Gallery: If created, a gallery of images related to the location.
To edit a location, simply click on the “Edit” button at the top of the right-hand side menu.
If you have a long list of locations, you can search for a specific location by entering its name.
Each location has a three-dots (…) menu on the right of the page, allowing you to:
- Edit: Make changes to the location details.
- Delete: Remove the location from the list.
Note:
If you attempt to delete a location that has past or future appointments connected to it, a warning will be displayed to prevent accidental deletion.
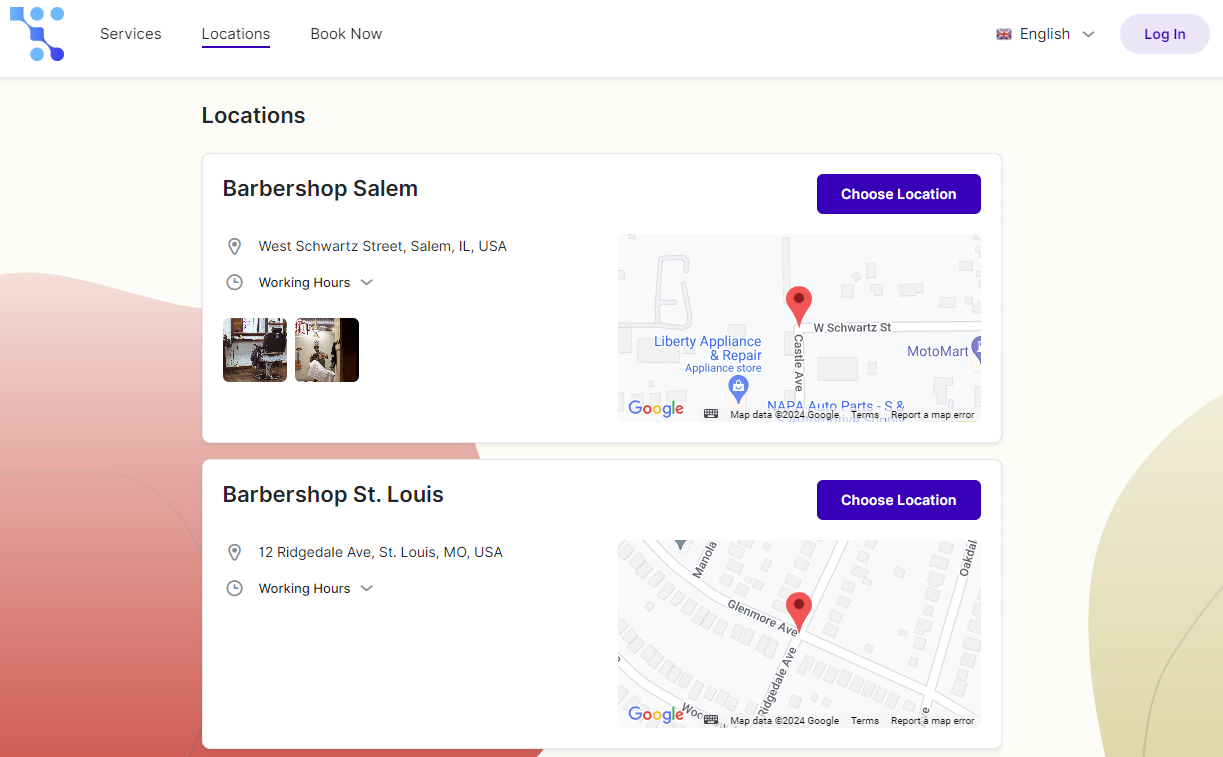
On your Booking Website, customers will find the “Locations” tab at the top. When they click on it, they will be able to view all physical locations (online locations will not be displayed):
Have more questions?
If you face an issue, and cannot find an answer in the documentation, feel free to submit a support ticket!